Slingshot
Slingshot is the SNS automation engine for EVO that powers search, preview, replication, and more. It provides task management for repetitive file operations on EVO and other systems, including cloud storage. In addition to indexing and proxy generation, user-created Slingshot Automations can perform actions on schedule, and Replication Jobs can copy and back up to and from remote SMB or cloud targets.
Slingshot is available as a component requiring initialization, and is not required for standard EVO operation, though it does provide for many additional features and added functionality, including ShareBrowser.
Initialization
Components are often started as a convenience during commissioning, while there may be instances in which ShareBrowser/Slingshot are not initialized, or need to be deinitialized. If components are not initialized, clicking ShareBrowser or Slingshot in the interface will return “Scheduled backup for component databases is not configured”

Once configured, EVO will automatically generate backups of the ShareBrowser and Slingshot database. This requires allocation of some storage (typically under 1 GB, depending on database and retention policy). Click to specify share for backup and restore of the database.
Locate the Component databases card at the Support page.
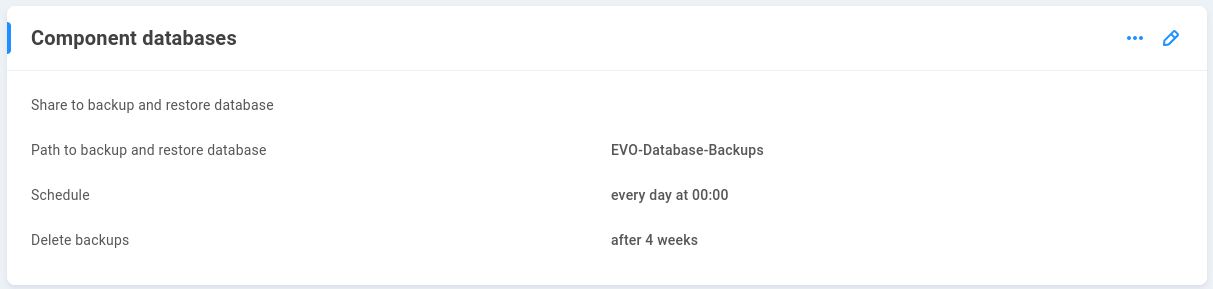
Click to edit and select a share to store database backups. This is often a share for which only an administrator or secondary administrator is granted permission (typically named “sys-management”).
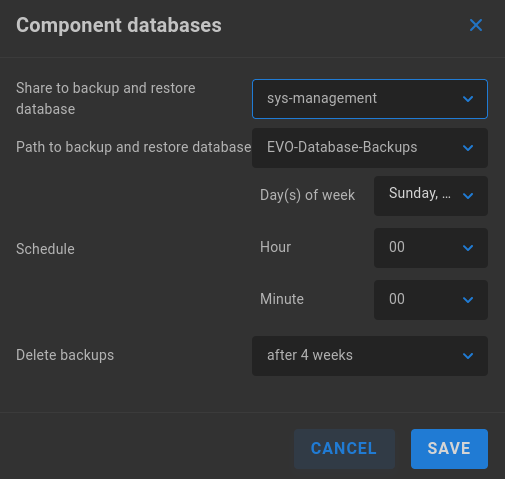
Save and then click the Slingshot menu item again to initialize ShareBrowser Server and Slingshot.
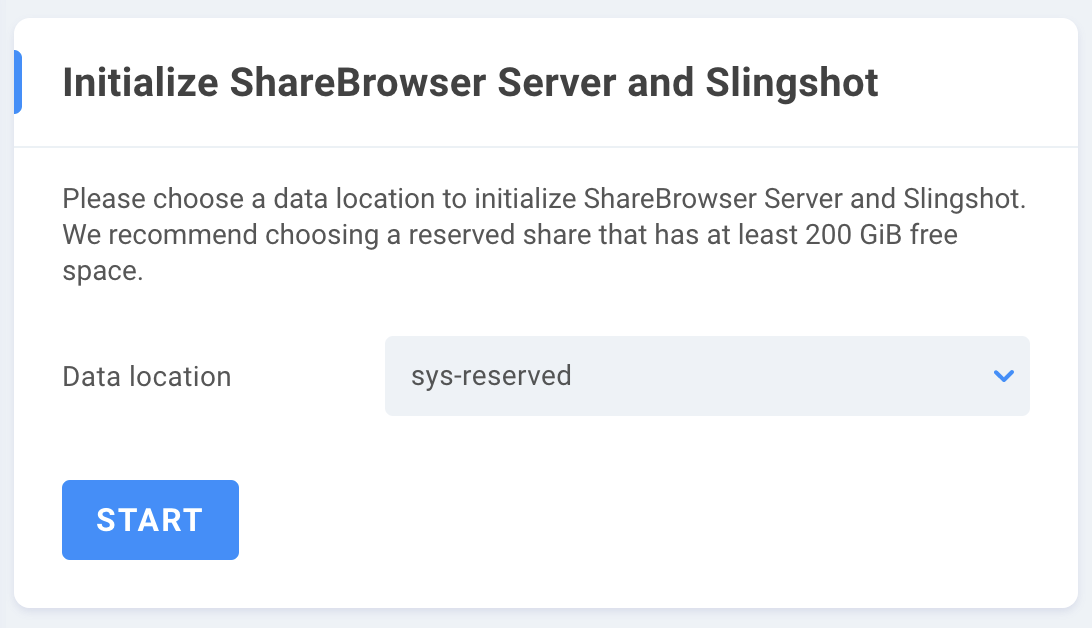
Initialization requires a dedicated system share for the active automation engine. The share needs to be in the Reserved permission mode, recommended with at least 512 GiB available for system use (typically named “sys-reserved”).
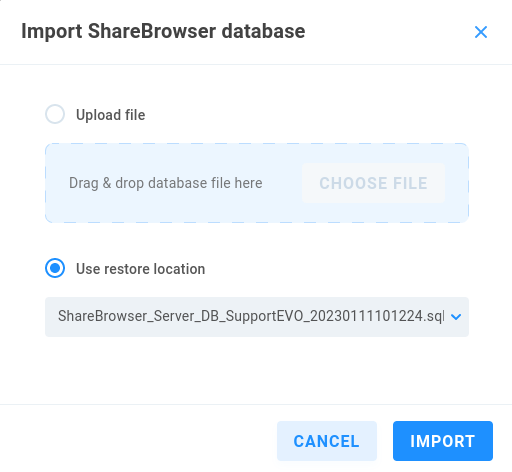
If an existing database is to be restored, a previously exported backup may be uploaded, or an existing backup on EVO may be selected. Click the dots at the Component databases card to import an existing database.
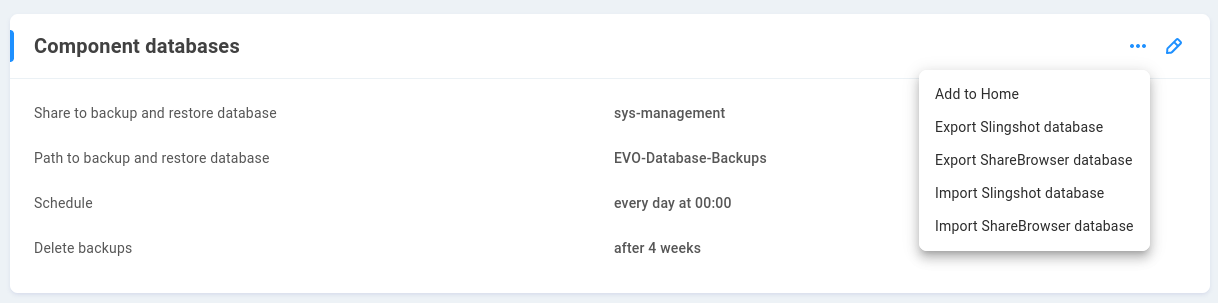
Select “Upload file” to drag and drop or browse for the database backup file on your workstation, or select “Use restore location” to import from an existing backup location on EVO.
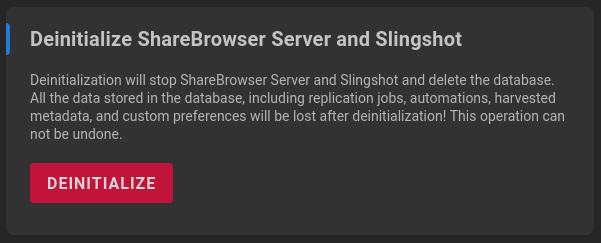
If there’s ever a need to deinitialize components, the option is found at the #/master-reset page.
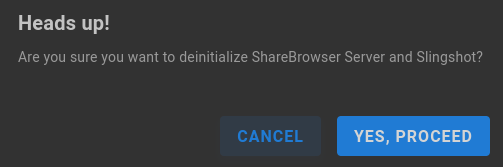
A prompt will appear asking for confirmation. Take care that database backups are available for restore if needed, following reinitialization of components.
Replications
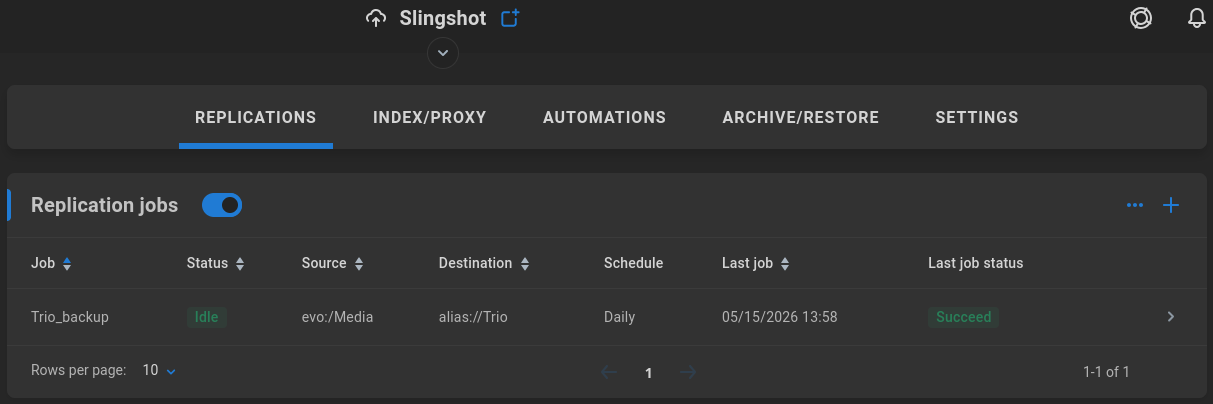
Schedule replication operations between volumes or directories. Configure any needed external targets such as Amazon S3 or remote SMB shares, and then click the plus sign to set up a replication job.
Configure a job to copy new/changed folders and files from the selected source to the selected destination. Objects with the same path/name will be overwritten at the destination. File permissions, metadata, and other attributes may not be applicable for backup. Cloud-based transfers will incur bandwidth charges by your cloud storage provider. Bidirectional job schemes are not supported.
Copy/Replace vs Sync/Remove
Choose “Copy/Replace” if objects removed from the source location should NOT be automatically removed from the destination location.
Choose “Sync/Remove” if objects removed from the source location should be automatically removed from the destination location. Use “Sync/Remove” with caution to avoid accidentally deleting data at the destination!
More information is found in the Slingshot Replication (Sync/Copy) best practices and configuration guide: https://support.studionetworksolutions.com/hc/en-us/articles/360027021212-Replication-Sync-Copy-best-practices
Warning
It’s expected that only Slingshot will be used to modify replicated contents at the destination directory. Care should be taken not to otherwise modify the destination content following replication, especially when ShareBrowser is used, since it can create a discrepancy in the ShareBrowser database.
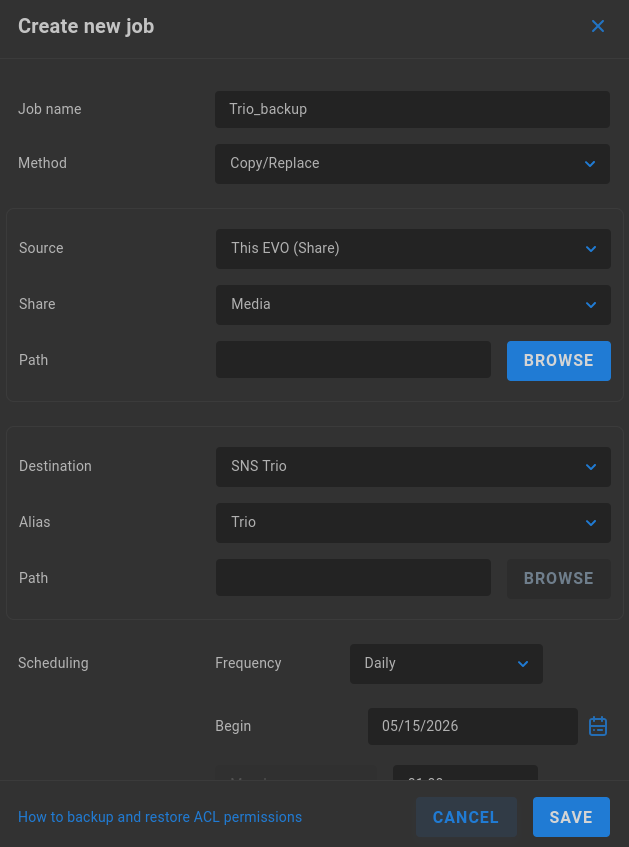
Job name - Give the job a descriptive name. Note that spaces and other special characters are not allowed.
Method - The options presented here are Copy/Replace or Sync/Remove. Replication jobs default to Copy/Replace, which means content added to the source will be copied to the destination, and any content that’s been deleted from the source since the job was last run is left in place on the destination. If Sync/Remove is chosen, content added to the source is added to the destination, and if content has been deleted from the source since the last job was run, it will also be deleted from the destination.
Source - Select the source to be replicated. The default selection is for a local EVO share. It’s also possible to replicate a complete EVO logical disk, another SMB or FTP target, or a connected cloud location.
Share (or Logical Disk/Alias) - This field changes according to the Source selection. Select the share, disk or alias to use as a source for replication.
Path - Enter or BROWSE to a specific directory on the above selection if needed. If left blank, replication will work at the root (top level folder) of the above selection.
Destination - Select the target destination to which the source selection should be replicated.
Share (or Alias) - This field changes according to the Destination selection. Select the share or alias to use as a destination for the replication target.
Path - Enter or BROWSE to a specific directory on the above selection if needed. If left blank, replication will work at the root (top level folder) of the above selection.
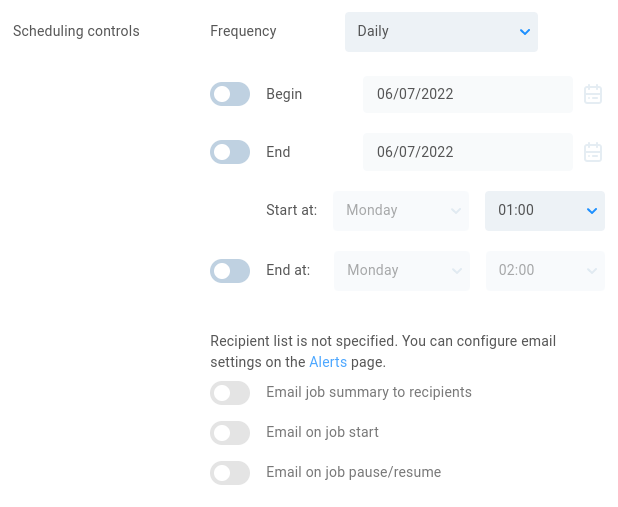
Scheduling controls - Set the frequency for the replication job. This can be a manual job run on-demand, or a scheduled operation to run once or recurring at a defined interval. Select the Begin and End dates, and then choose the start day/time for the operation to run. The job will end on its own unless an End time is specifically defined. If the job is still running at that time, it will be paused until the next start interval.
Configure email settings on the Alerts page. If SMTP is configured, email notifications can be sent for job summary, job start, and changes to the job status (pause/resume).
Advanced settings
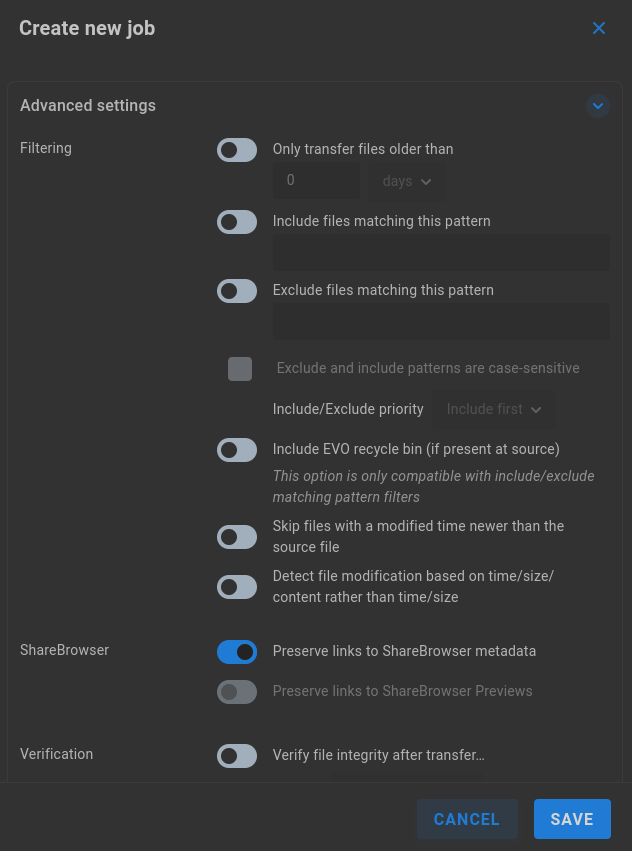
Filtering - Include logic for transferring files based on age, or configure regex pattern matches for inclusion/exclusion behavior. Choose whether or not to include the recycle bin (if present at source).
Only transfer files older than - Select number and unit of time (seconds, minutes, hours, days, weeks, months, years) to replicate only files of a qualifying age.
Include files matching this pattern - Enter regex for file inclusion filtering.
Exclude files matching this pattern - Enter regex for file exclusion filtering.
Exclude and include patterns are case-sensitive - Filtering is case-insensitive by default. Check the box if case sensitive filtering is preferred.
Include/Exclude priority - This dropdown menu is available if both inclusion and exclusion rules are defined, and is used to define which filter should be applied first when a replication job is run.
Include EVO recycle bin (if present at source) - Content in an EVO share’s recycle bin is not included by default in replication jobs. Toggle to include recycled contents if a recycle bin exists at the source location. This option is only compatible with include/exclude matching pattern filters.
Skip files with a modified time newer than the source file - Enabled by default, this setting prevents files that have already been replicated from being copied again, since the source file is older than its copy by nature. If a file has been replicated, and is subsequently modified at the source, the updated source file will be included in the next replication job after the source and destination file modification times are compared. This can be disabled to ensure all files are replicated, overwriting any that already exist at the destination.
Detect file modification based on time/size/content rather than time/size - Disabled by default, this setting provides greater assurance of faithful replication by additionally checking file content. Note that the added verification may significantly increase the time required for replication, since source and destination files are read for comparison.
ShareBrowser - If enabled, Slingshot can ensure ShareBrowser metadata and/or proxy links are preserved. These metadata are not replicated with the file; rather, replicated content is reflected in the ShareBrowser database, allowing the database to be searched and or previewed, even when the original files have been replicated to another system and may no longer be directly accessible.
Verification - By default, replication jobs will copy any file that is not yet found at the destination, or any file is newer at the source than at the destination. Files at the destination that are newer than the unchanged source files (previously replicated) will be ignored.
Verify file integrity after transfer… - Disabled by default. The default calculations for data comparison are sufficient in most scenarios, while some environments may require bit by bit verification. The added calculations will greatly increase the time required for the replication job to run, though this does provide a record of proof that verification was completed. The Report value can be set to show Only differences, or All files.
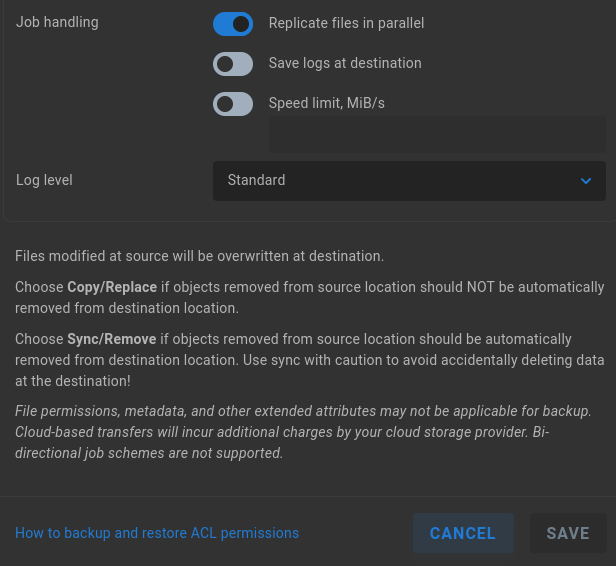
Job handling - Files are replicated in parallel by default (multiple actions). This can be changed to serial to ensure single-stream writes. A Transfer Summary is automatically provided at job’s end, while it’s also possible to save more detailed logs for the job at the destination.
Replicate files in parallel - Enabled by default. Disable to perform sequential replication.
Save logs at destination - Disabled by default. A transfer summary report is added to the destination by default; enable this setting if a detailed transfer log should be added to the destination as well.
Speed limit, MiB/s - Disabled by default. Enable and enter a number to set a maximum-allowed transfer speed. This setting may be useful to protect against bandwidth overages on metered connections, and/or to reduce the impact on users from bandwidth usage by concurrent automated tasks.
Log level - Replication jobs will provide a standard level of logging to EVO logs by default, or at the destination if configured. This can be set to No logging or Full logging for the most verbose output.
Warning
Slingshot replication jobs do not consider ACLs (file-level permissions), so user visibility and access permission for replicated content needs to be managed at the target destination.
How to backup and restore ACL permissions - This option is only present when EVO is in the Folder / File level permission mode, and the linked article provides guidance for reapplying granular permissions at a remote location.
Click on an existing Replication job to expose/hide options.
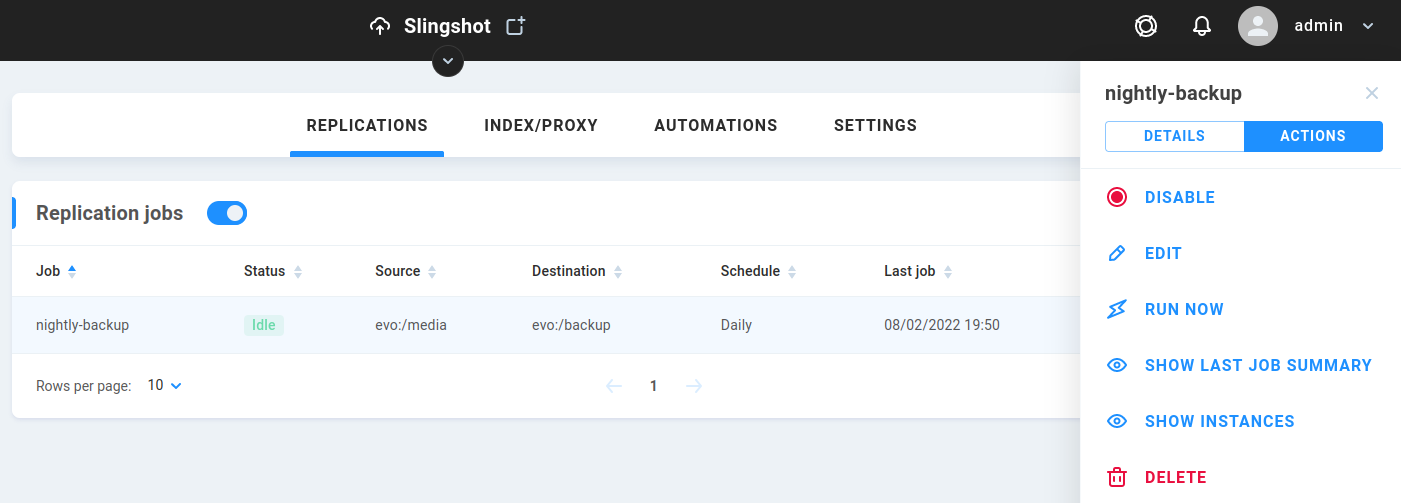
Disable/Enable - Toggle the status for the replication job
Edit - Make changes to a disabled replication job (enabled jobs may not be edited)
Run Now - Ignore schedule and run on demand
Show Last Job Summary - View summary of the last iteration of the selected replication job.
Show Instances - View more detailed information according to Instances > Processed files > Processed tasks
Index/Proxy
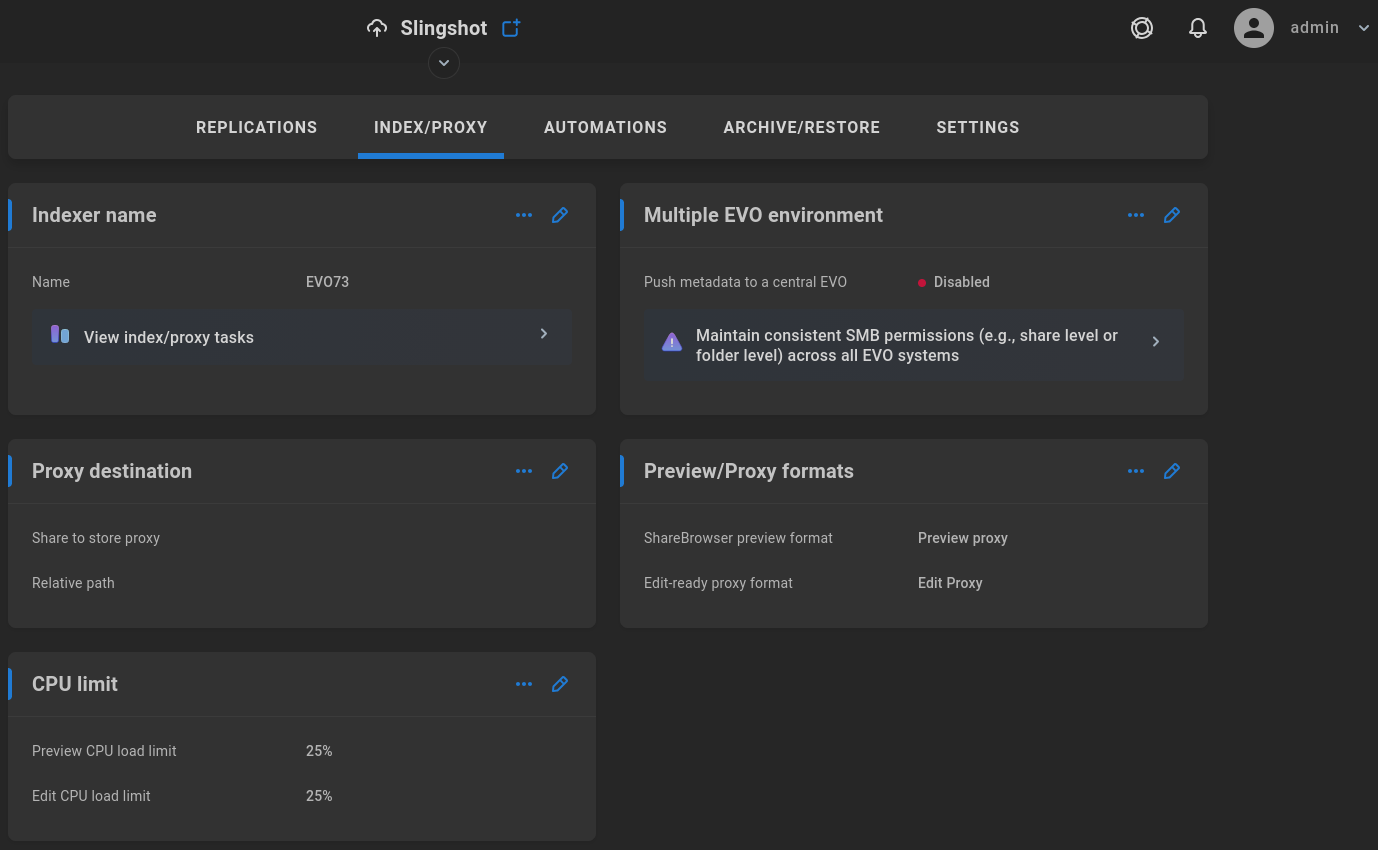
Indexer name
The indexer name typically reflects the host name. Setting a custom indexer name can be especially useful in a multiple EVO environment. Click the pencil to edit the name.
Multiple EVO environment
ShareBrowser clients will typically log in to only one ShareBrowser server, so if multiple EVOs exist in the environment, it’s useful to select one EVO to store the primary database, and configure other EVOs to index to that central server. Disabling ShareBrowser server on other EVOs will prevent users from inadvertently connecting to a secondary server. Click the pencil and then toggle “Push metadata to a central EVO” on, and new options will appear. Disabling the server component on satellite EVOs in the environment is a simple way to ensure users always log in to the selected ShareBrowser server.
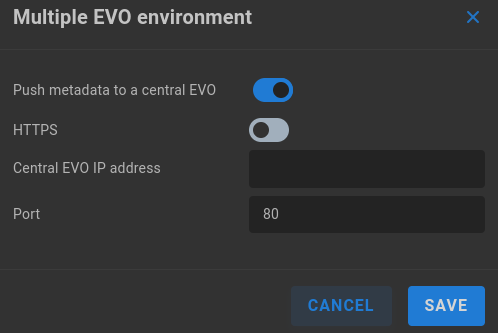
HTTPS - Disabled by default. If enabled, all EVOs involved will need to have HTTPS configured.
Central EVO IP address - Enter the IP address for the central EVO that holds the primary ShareBrowser database.
Port - Set to 80 for http and 443 for https by default, or a custom port can be specified.
Proxy destination
The Slingshot engine can be configured to automatically create proxy files from original media. To configure proxy generation, a share needs to be designated to house the created proxies. This share is typically named something like “Proxies” and is for use by the ShareBrowser database only, so no users should need permissions.
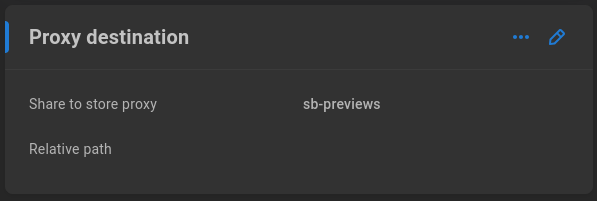
Share to store proxy - Select a share from the dropdown menu to dedicate to proxy storage.
Relative path - Specify a folder if needed; otherwise, the root of the share will be used.
Preview/Proxy formats
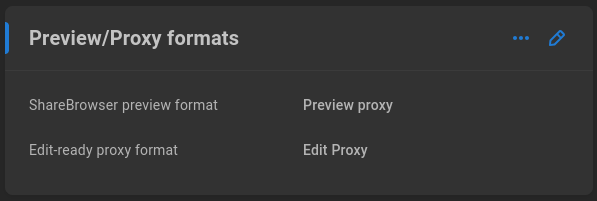
Depending on source file type, the proxy output could be a thumbnail, audio, or video preview. The default behavior should ensure each supported file is transcoded according to its type, and this section can be used to specify global formats for preview/proxy types. This could be used to ensure only thumbnails are generated, for example, rather than thumbnails and video previews. The default ShareBrowser preview (what’s viewed in ShareBrowser without direct access to the volume) selection is “Media proxy”, which is a lightweight (H.264) version of the original file. The “Edit-ready proxy format” is Pro Res by default, which is generally still going to be smaller than the original file, while providing more options for offline/proxy editing than a standard ShareBrowser preview proxy would.
ShareBrowser preview format - Preview proxy by default (H.264). Use the dropdown menu to select an alternative preset if needed.
Edit-ready proxy format - Edit proxy by default (Apple Pro Res). Use the dropdown menu to select an alternative preset if needed.
Proxy formats are configured in the Presets section of the Slingshot Settings page
CPU limit

EVO is designed with editors in mind, and the primary goal is to ensure users have the resources available to work simultaneously with shared media, while EVO may also be tasked with numerous automation jobs. One goal is to find a balance between human users and automated jobs, often configured to run after-hours when users are not working on the system. To ensure users have the needed resources available, the processing power dedicated to automations such as indexing, proxy generation, and replications is limited to 25% by default. If resource management and scheduling is considered, these values can be adjusted to tune the task processing specifically according to the needs of the environment.
Preview CPU load limit - By default, 25% CPU is allocated for generation of ShareBrowser previews of indexed content. This can alternatively be set to 50% or 75%.
Edit CPU load limit - By default, 25% CPU is allocated for generation of edit-ready proxies of indexed content. This can alternatively be set to 50% or 75%.
Index and Proxy generation
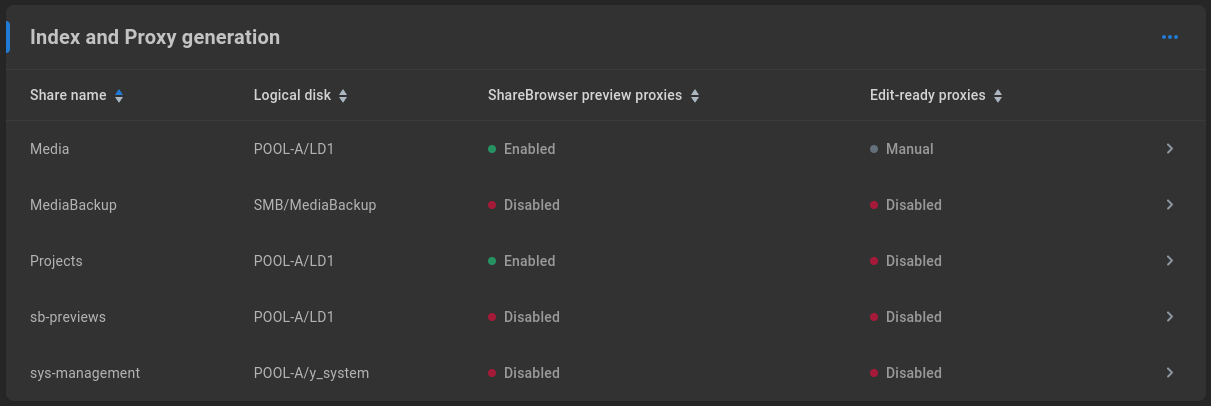
The list of shares available for proxy generation should be automatically populated with any shares for which proxy generation is possible. Once storage has been configured to contain the proxy output, shares can be configured for automatic preview and/or edit-ready proxy generation.
Select a share to bring up its configuration options.
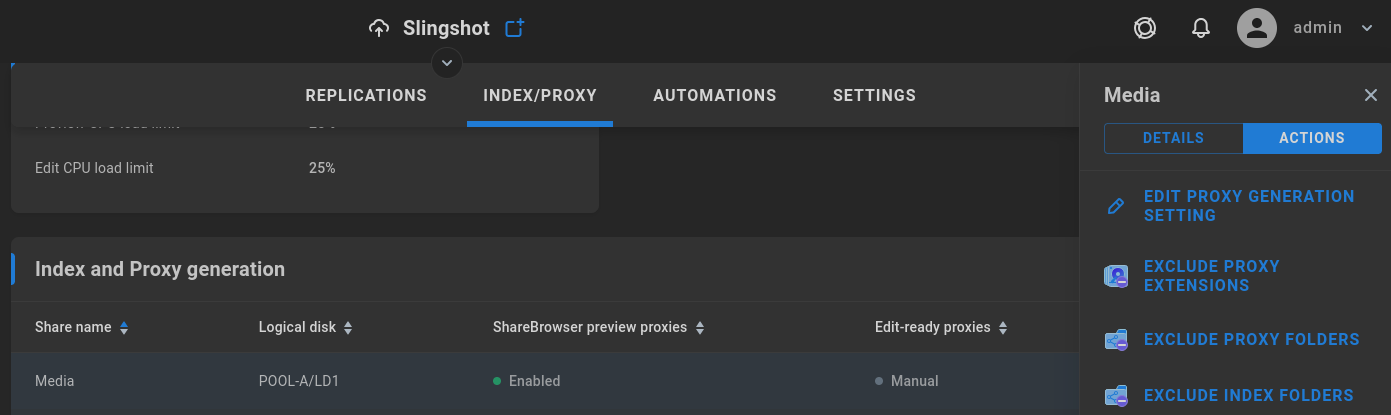
When components are initialized and configured, Slingshot will automatically perform recurring index and transcode operations for ShareBrowser search and preview, and optionally create edit proxies of media. The Preview/Proxy generation service runs hourly by default, and acts on the indexed records (index is required for proxy generation).
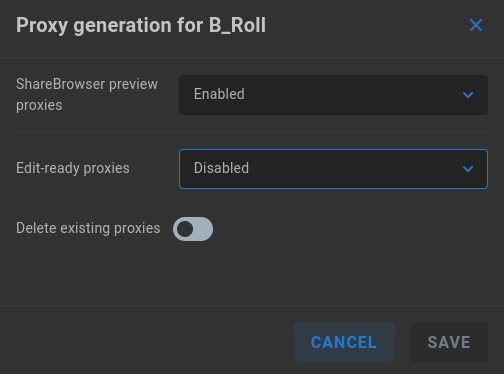
Edit Proxy Generation Settings - Select to configure transcode options for the chosen share.
ShareBrowser preview proxies - Enabled by default. If disabled, an option to delete existing proxies is shown.
Edit-ready proxies - Disabled by default. When set to Automatic, proxy generation is attempted for all media on the share. When set to Manual, ShareBrowser users may issue requests for edit proxy generation of specific content.
Delete existing proxies - This toggle is only presented when a proxy setting is disabled, to ensure cleanup of unused files.
Note
Care should be taken when choosing a selection for Edit-ready Proxies, which may require a significant amount of time and disk space to generate and store. In some cases, it’s possible the resulting edit-ready proxy may be larger than the original file. Choosing Manual proxy generation to allow ShareBrowser users to request edit-ready proxies as needed is a safe approach to ensure only intended media is transcoded at a higher quality or custom preset.
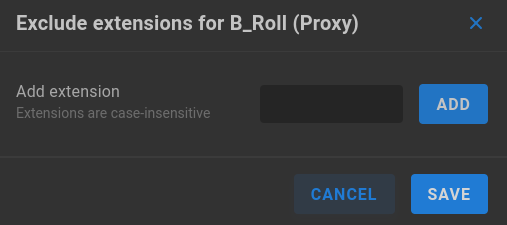
Exclude Proxy Extensions - Enter any file extensions (case-insensitive) to skip during Preview/Proxy generation. Note this list is share-specific, separate from the global Proxy exclusions <Proxy exclusions> list on the same page.
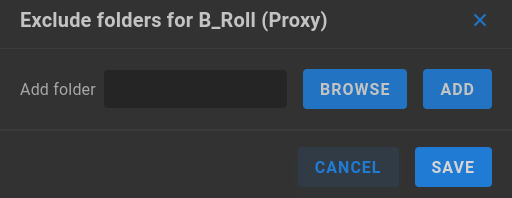
Exclude Proxy Folders - Enter or browse to and select directories on the share for which no proxies are intended.
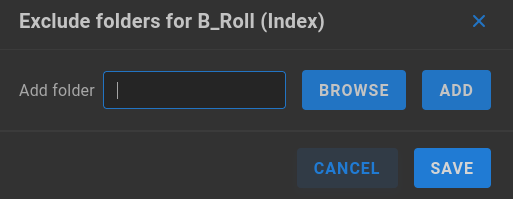
Exclude Index Folders - Enter or browse to and select directories on the share for which indexing is not intended.
Note
Excluding from indexing will also prevent proxy generation for the selection, since proxies are generated according to indexed content.
Schedule
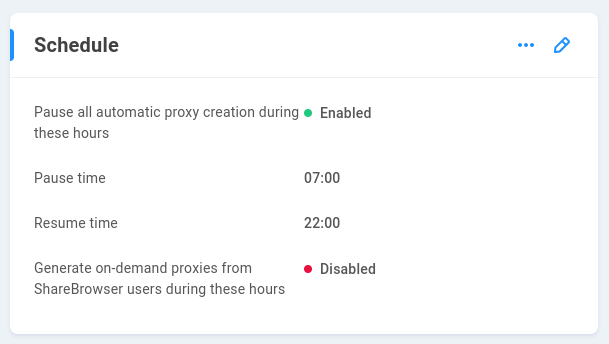
By default, indexing jobs run daily and transcoding jobs run hourly, to generate previews and/or proxies. Enabling a pause period may be useful to ensure users are not competing with automations for resources. Click the pencil to edit these choices.
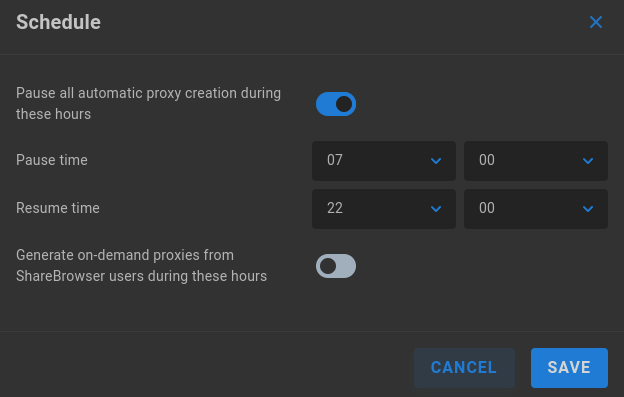
Pause all automatic proxy creation during these hours - Off by default. When disabled, Slingshot will work around the clock if needed, and users may generate proxies on demand. Enable to define a pause schedule.
Pause time - With pause enabled, specify the time that the proxy generation queue should stop processing new items.
Resume time - With pause enabled, specify the time that proxy generation may resume.
Generate on-demand proxies from ShareBrowser users during these hours - When enabled, allows users to make custom proxy generation requests even when Slingshot proxy generation is otherwise paused.
Note
Some time should be allowed for “spindown” when a pause period starts. Pausing will ensure no new tasks will be added to the running automation, while tasks already in progress will continue running.
Proxy exclusions
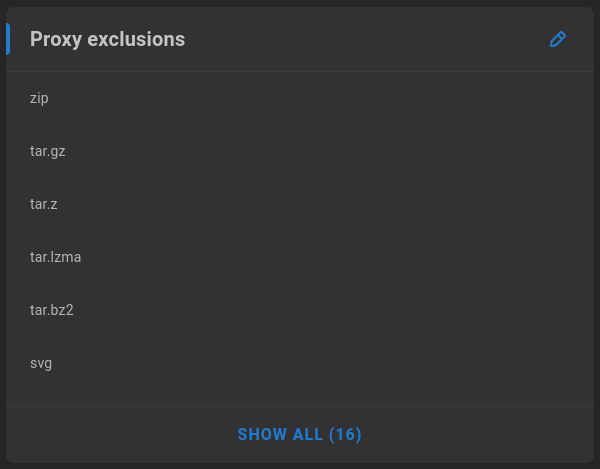
Some file types are expectedly unsupported for proxy generation, and excluding them can increase efficiency for the automation tasks. For example, a video preview cannot be generated from a compressed .zip file, so excluding all zip files from consideration can save time. This list is pre-populated with some default file types that should be skipped by the transcode engine. Click the pencil to add or remove any extensions for exclusion.
Automations
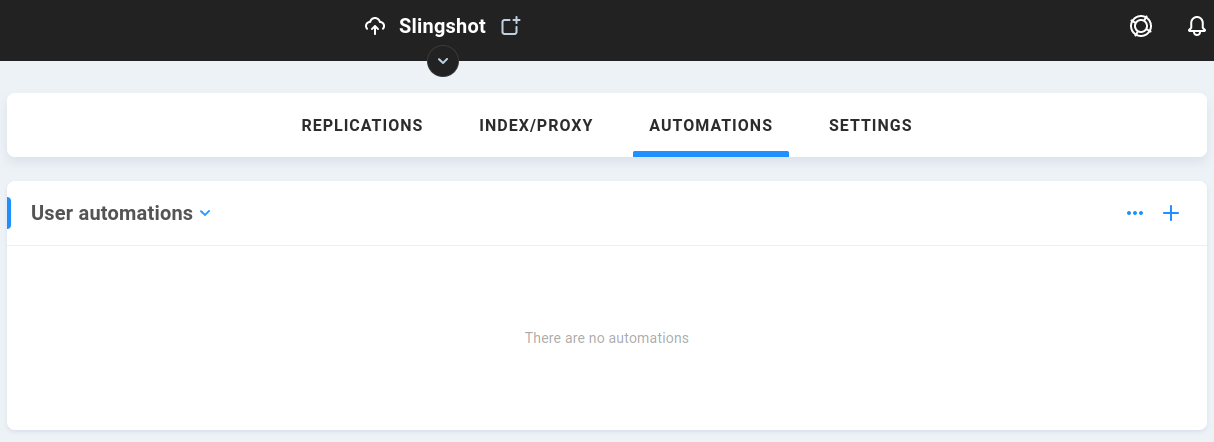
This section exposes automations, which may be ShareBrowser indexing or proxy generation tasks, admin or user-created custom automations, or AI/ML functions. Select the type from the dropdown menu to expose its options.
Index/proxy tasks
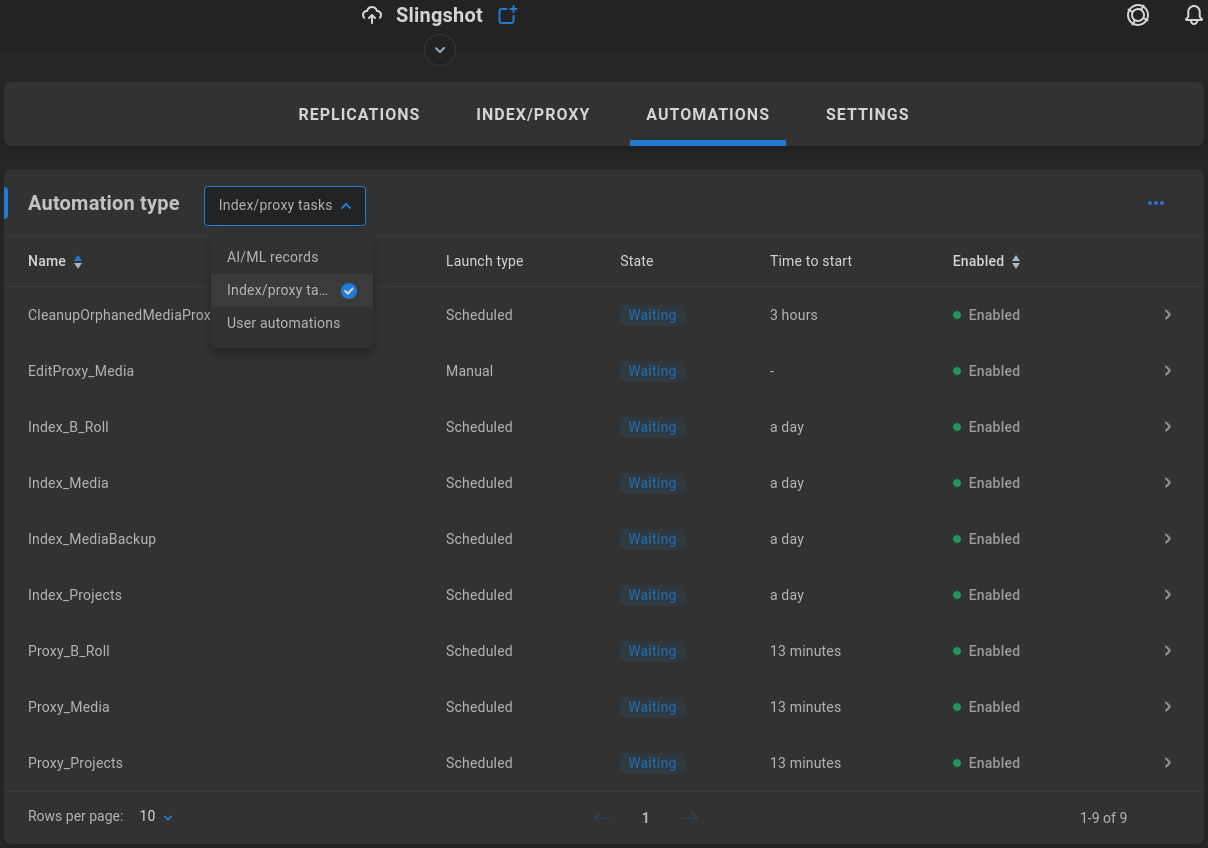
The Index/proxy tasks dropdown selection displays details about indexing and proxy generation. Shares are automatically indexed at 10:00 PM daily by default. The ShareBrowser indexing schedule is managed from the ShareBrowser Admin application. The proxy generation service runs hourly, based on what’s been indexed.
Click on en existing index/proxy automation to bring up its ACTIONS and DETAILS.
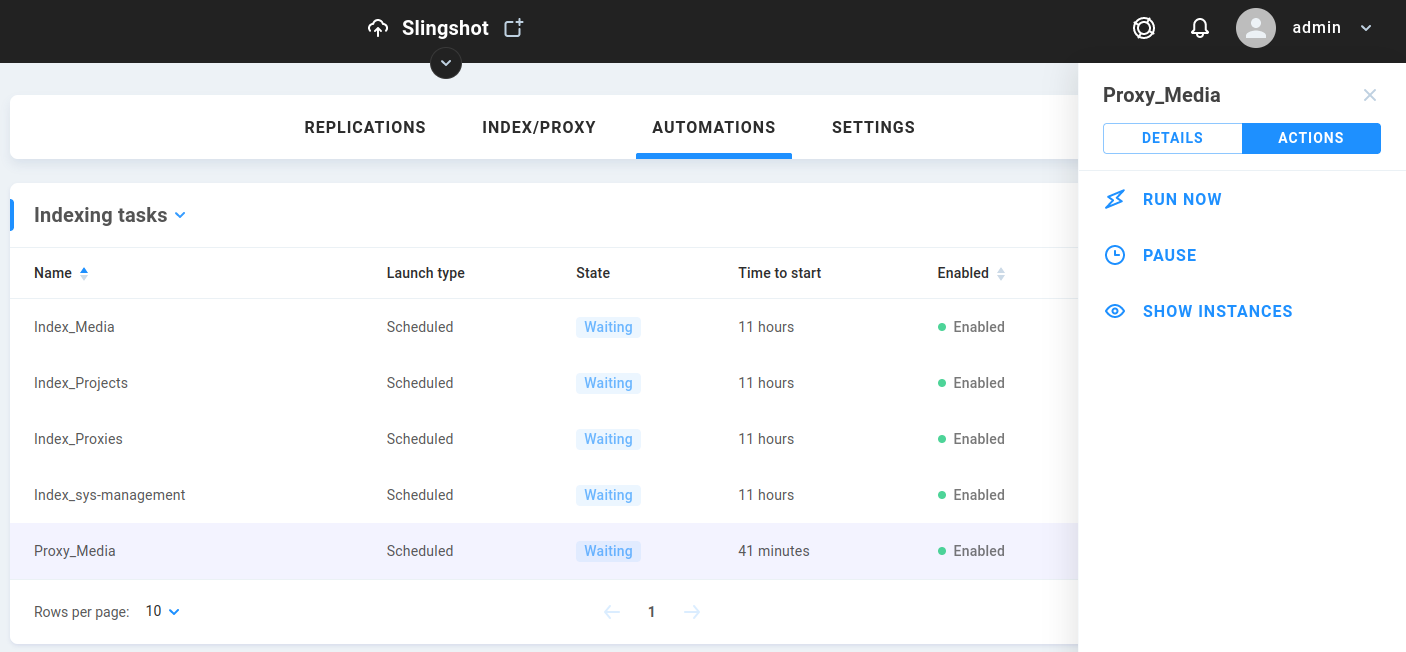
Run Now/Stop Run - When the job is idle, the option is presented to run it manually. When running, the option to stop it is presented.
Pause - A job can be put on hold without being stopped altogether, for example to free up resources temporarily.
Show Instances - This provides details about the active/previous job, including dynamically updating columns for estimated file counts (Total, Succeed, Failed, Unprocessed). Clicking on a row brings up Processed files, where again clicking on an ID row brings up Processed tasks.
Note
When configured, the proxy generation service runs hourly based on what’s been indexed. This is different from an on-demand (ad hoc) proxy request by a ShareBrowser user, in which case the file is indexed and transcoded (if configured and allowed).
User automations

Custom tasks may be scheduled to run on specific folders, including file copies, moves, renames, transcodes, and more. On-demand user-specific and recurring global tasks can be defined to automate a workflow based on watch folders.
Click the plus sign to create a custom folder-level automation.
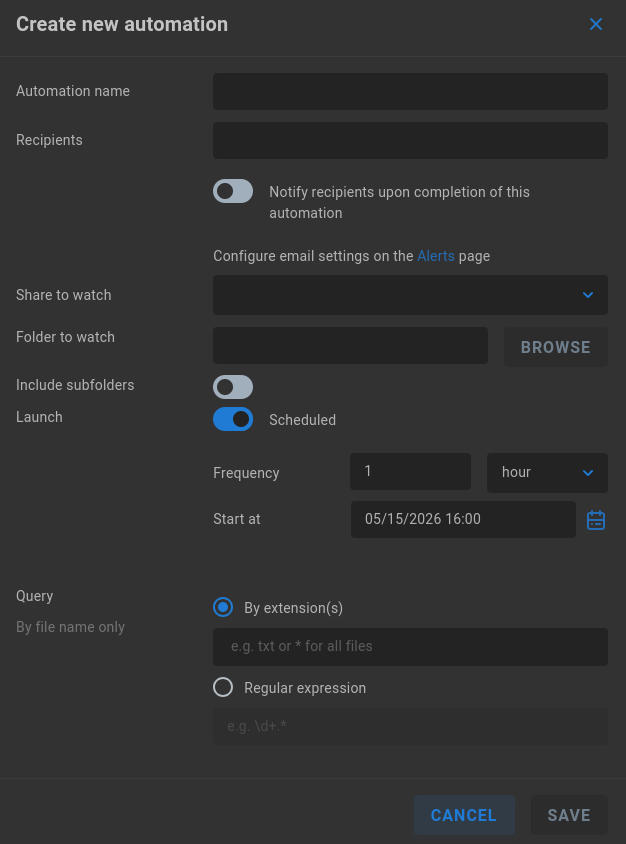
Automation name - Give your automation a descriptive name.
Recipients - If SMTP is configured, email notifications can be sent informing of automation completion.
Share to watch - Select the share on which the automation action should be taken.
Folder to watch - Specify a watchfolder for the automation task. If left blank, the root of the share will be used. Note that this is not recursive, so the selected folder’s subdirectories are not considered by the automation.
Include subfolders - Disabled by default. When enabled, automations will include all subdirectories for the watch folder. Consider the depth of traversal when configuring an automation, and note that certain directory types may be typically treated as a single file (Final Cut and Red media, for example), which can lead to potentially unexpected results following automated operations.
Launch - If the automation should run on a defined interval, choose Scheduled (default) and select the frequency (minute, hour, day) and start time for the automation.
Query - File name only. Select whether the automation should query By extension(s) (e.g. txt or * for all files) or Regular expression (e.g. d+.*).
Note
Preservation of filesystem hierarchy gets complex very quickly for automations, especially when source and destination file structures and permissions may differ. Custom user automations are therefore run on a single folder’s root level.
Save the automation when done and then click it again and choose EDIT AUTOMATION to add your task(s). Tasks can be stacked, so it’s possible to perform many chained actions within the same automation.
Warning
Automations have the power to change data. Always practice the automation logic on test files/folders before putting an automation into production.
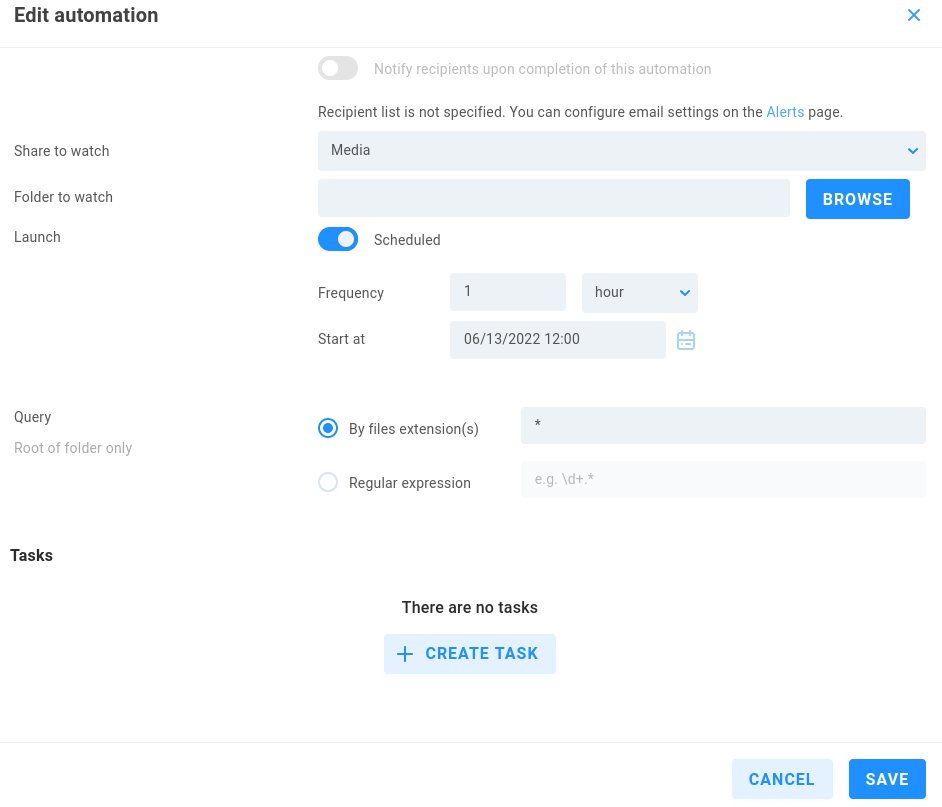
Click Create Task to expose the options.
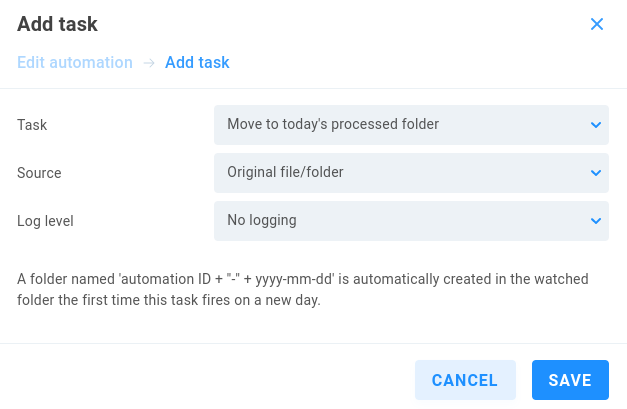
Task - A dropdown allows for selection from the list: Transcode, Delete, Tricaster streaming, Copy, Move to today’s processed folder, Append automation data to file name, AI/ML Autotagging
Transcode
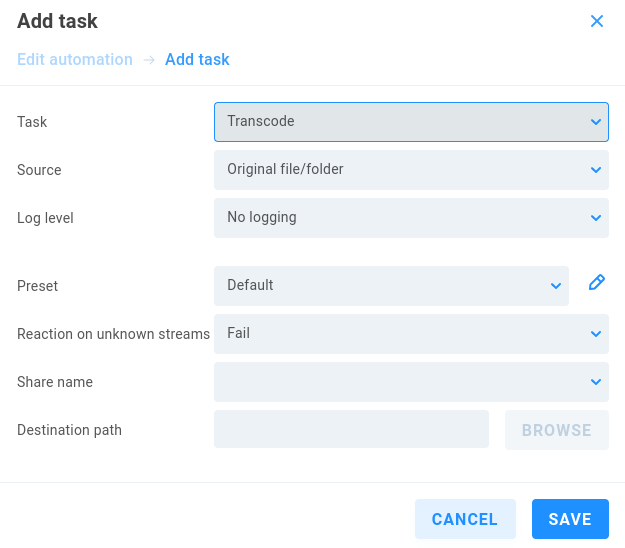
Source - Select Original file/folder or previous task result to use the output from a previous task from the same automation job.
Log level - Choose from No logging (default), Standard or Full logging.
Preset - Default will perform the default transcode for each file type (preview proxy, thumbnail, etc.), and more actions can be chosen from the list, including differing thumbnail sizes, Media proxy, Edit proxy, AI/ML Autotagging, or Audio proxy.
Reaction on unknown streams - If the task encounters an issue, the behavior can be set to Fail (default), Ignore, or Copy. If set to Fail, several attempts are made. If set to Ignore, the problematic file is skipped. If set to Copy, the original is copied (rather than transcoded).
Share name - Specify or browse to the share on which the task is to take place.
Destination path - Define or browse to the destination directory for the transcode output.
Delete
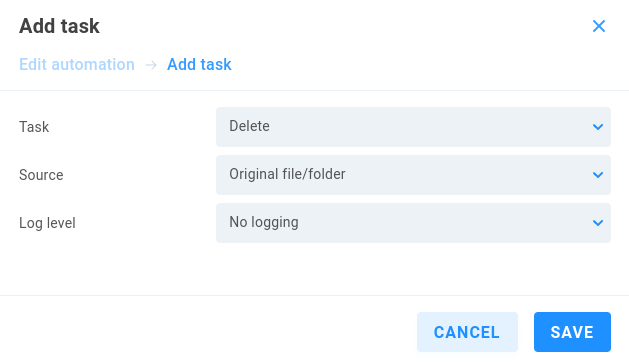
The Delete option can be useful for removing original files once automation tasks have taken place.
Source - Select Original file/folder or previous task result to use the output from a previous task from the same automation job.
Log level - Choose from No logging (default), Standard or Full logging.
Tricaster Streaming
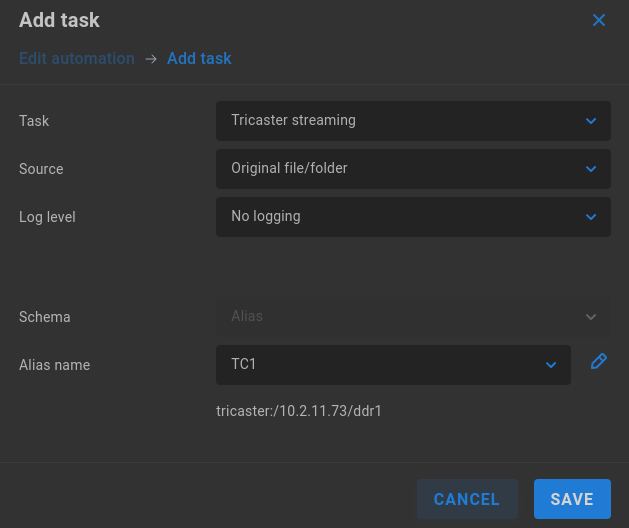
Use an existing Tricaster alias to send contents of a watch folder to a Tricaster DDR or GFX bin.
Copy
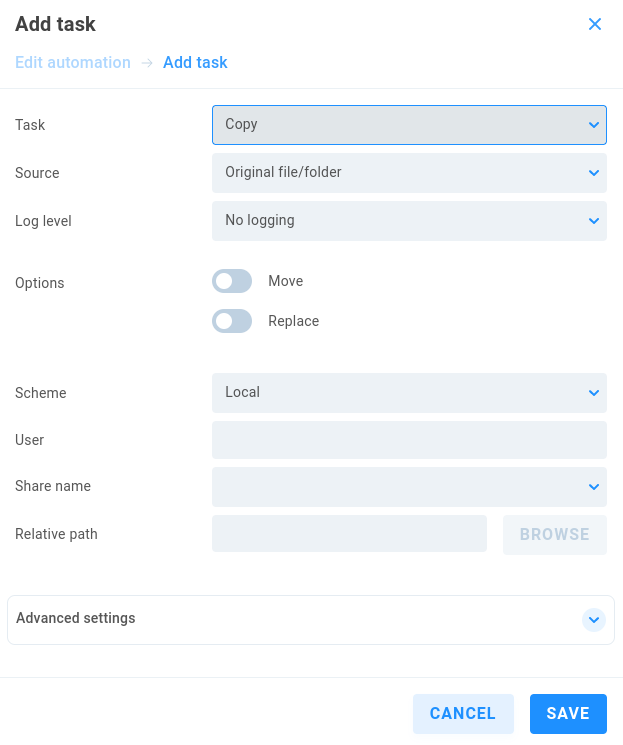
Source - Select Original file/folder or previous task result to use the output from a previous task from the same automation job.
Log level - Choose from No logging (default), Standard or Full logging.
Options - Move will move the file rather than create a copy. Replace will overwrite an existing instance of the output.
Scheme - Select Local (default) for a local file system operation, or Alias to select from an existing alias.
User/Alias - If the automation will work with a target requiring authentication, enter the relevant alias or user owner of the automation. This field can be left blank otherwise.
Relative path - Define or browse to the intended source.
Advanced settings
Create folder - When Create target directory is enabled (default), a new directory will be created at the destination if needed.
Speed limit - Enable to define a transfer speed limit in KB/s.
Move to today’s processed folder
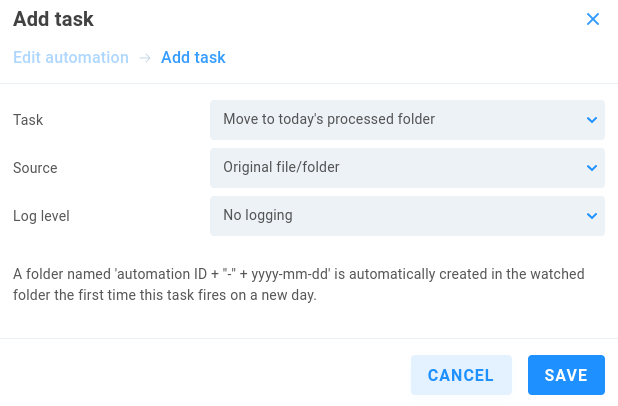
This option can be useful for stacked tasks and can prevent unintended recursion for the working directory.
Source - Select Original file/folder or previous task result to use the output from a previous task from the same automation job.
Log level - Choose from No logging (default), Standard or Full logging. A folder named ‘automation ID + ‘’-’’ + yyyy-mm-dd’ is automatically created in the watched folder the first time this task fires on a new day.
Append automation data to file name

This option can be useful as an intermediary step in an automation.
Source - Select Original file/folder or previous task result to use the output from a previous task from the same automation job.
Log level - Choose from No logging (default), Standard or Full logging. Append automation ID + ‘’-’’ + yyyy-mm-dd-hh-mm-ss to file name
AI/ML Autotagging
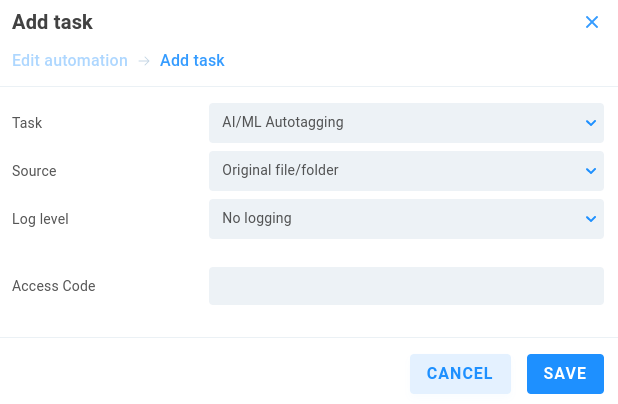
Source - Select Original file/folder or previous task result to use the output from a previous task from the same automation job.
Log level - Choose from No logging (default), Standard or Full logging.
Access Code - Optionally define a code to authorize use of the cloud AI service.
Note
Some AWS services may region-specific. Check the AWS console to ensure your bucket is in a region that provides AI/ML functionality.
AI/ML Records
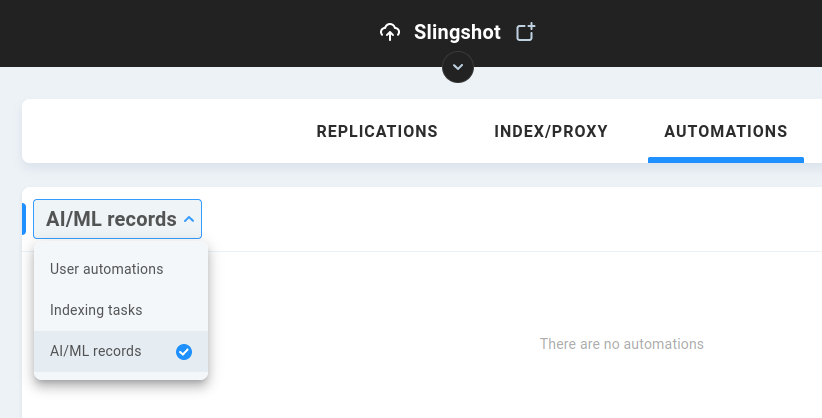
If configured for cloud-based autotagging, details from those ShareBrowser user-requested automations are displayed here.
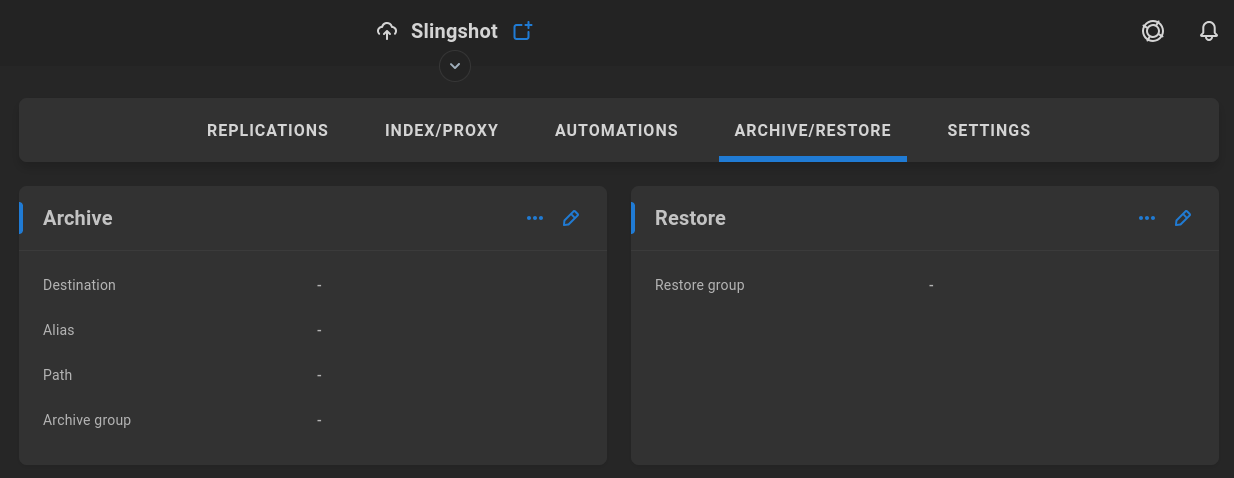
Archive/Restore
Slingshot adds archive and restore functionality to EVO and ShareBrowser, applying an icon for immediate visibility of what’s been archived, and allowing for deletion of the original while still retaining metadata and preview from within ShareBrowser.
Users can efficiently manage storage by archiving files/folders to remote SMB or S3 storage, and restoring them when needed. This feature is focused on freeing up local storage while ensuring files remain accessible for future use, with robust controls for permissions, metadata, and job management.
A valid remote SNS Trio, SMB, or S3 target is needed, as well as a selected local group. Users in the selected group will see archive and/or restore options presented when right-clicking contents from within ShareBrowser Desktop.
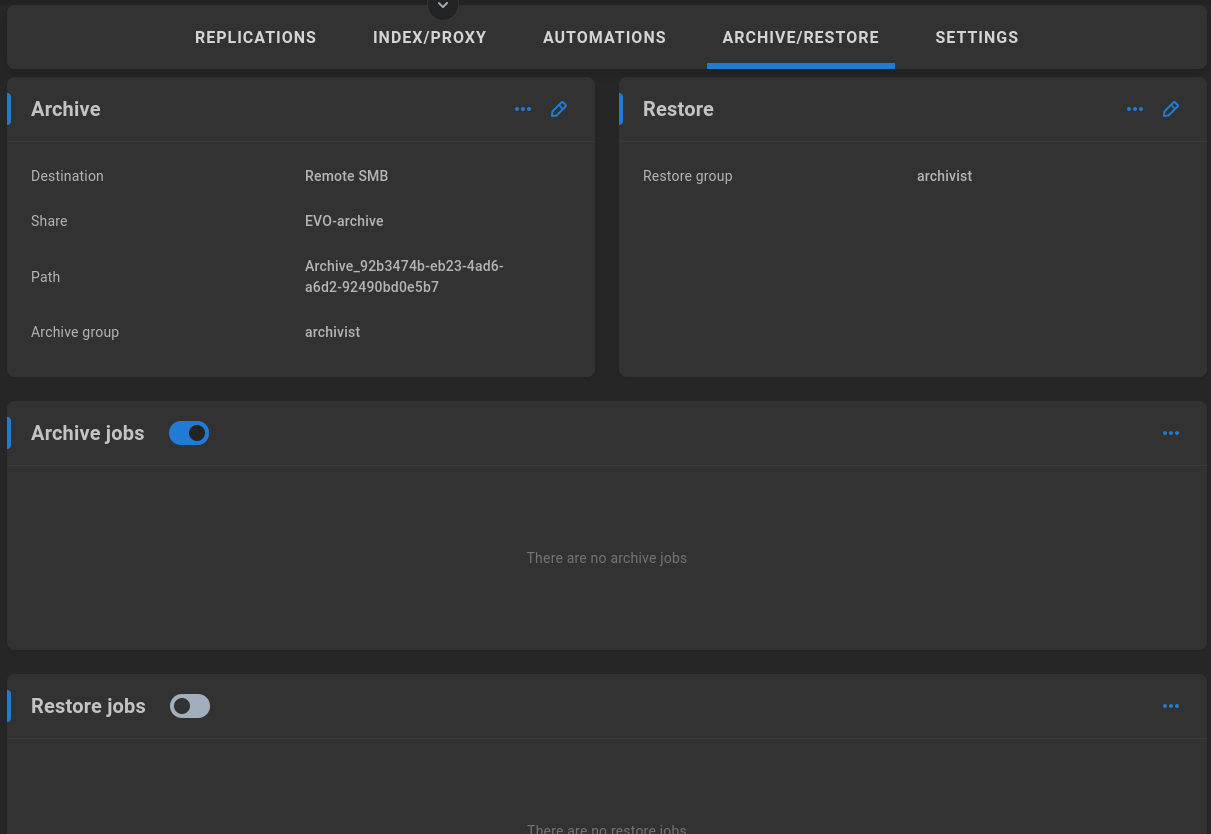
Archive
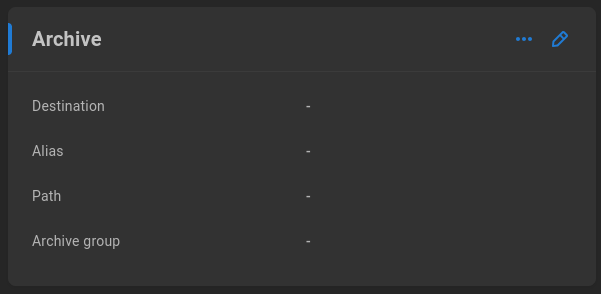
Archive jobs enable ShareBrowser Desktop users to archive files and folders.
Click to edit the available settings for Archive:
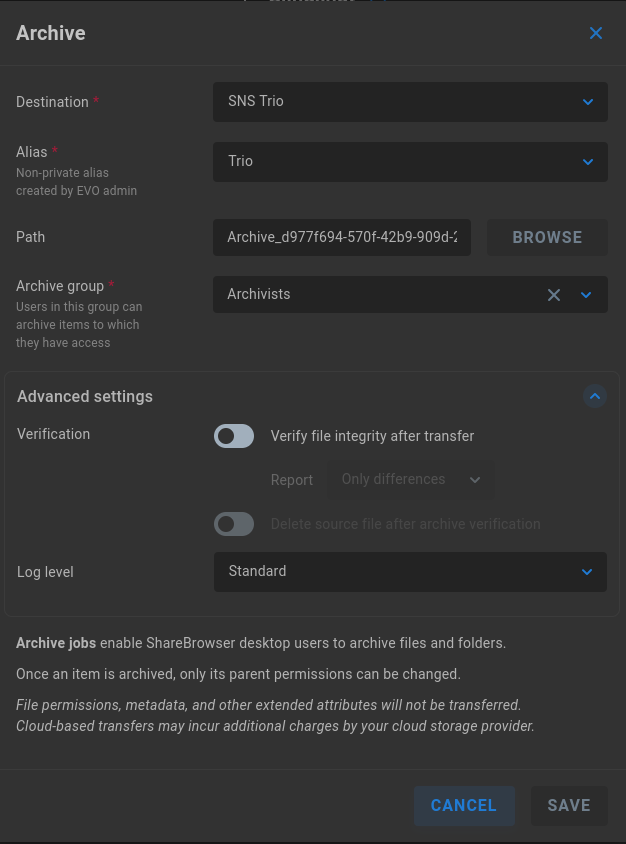
Destination - Choose the archive protocol (SNS Trio, SMB, or S3)
Alias (S3) - Select the preconfigured S3 alias, which must be non-private, and created by EVO admin
Share (SMB) - Select the remote SMB target
Path - Input or browse to a subdirectory where the archive directory will be stored. If no value is entered, a generic archive name will be used
Archive group - Select the group to be granted archive options in ShareBrowser Desktop
Advanced settings
Verification - Disabled by default. The default calculations for data comparison are sufficient in many cases, while verification is required if automatic deletion is intended. The added calculations will greatly increase the time required for the archive job to run, though this does provide a record of proof that verification was completed. The Report value can be set to show Only differences, or All files.
Delete source file after archive verification - Verification must be enabled to enable the automatic delete option.
Log level - Archive jobs will provide a standard level of logging to EVO logs by default. This can be set to No logging or Full logging for the most verbose output.
Once an item is archived, only its parent permissions can be changed. File permissions, metadata, and other extended attributes will not be transferred. Cloud-based transfers may incur additional charges by your cloud storage provider.
Tip
While a local group is required, external users can be added to local groups.
Note
Once content is marked as archived, it cannot be “unarchived”, even when restored.
Note
Archiving a folder that contains an archive is intentionally disallowed, as is archiving any file or folder located within the archive destination.
Warning
Files sent to archive may overwrite previously sent files. Items inaccessible to EVO will not be archived. Archive operations may only be canceled by EVO admin. The archive operation continues after logging out of ShareBrowser.
Warning
Depending on the target, a change in storage class (typically as a result of lifecycle management rules) can prevent Slingshot from restoring from archive until content is restored to its original archive location.
Restore
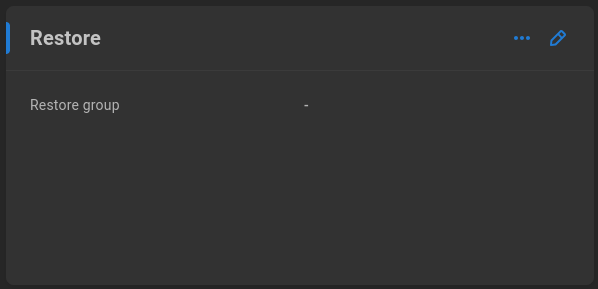
Restore jobs enable ShareBrowser Desktop users to restore archived files and folders.
Click to edit the available settings for Restore:
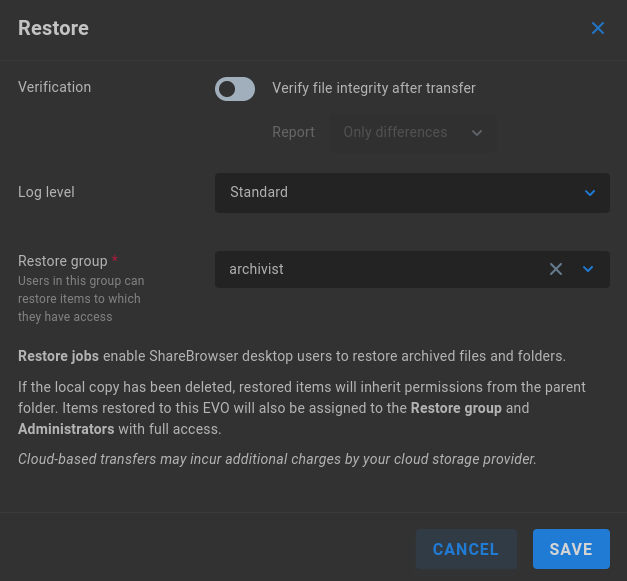
Verification - Disabled by default. The default calculations for data comparison are sufficient in many cases, while verification is required if automatic deletion is intended. The added calculations will greatly increase the time required for the archive job to run, though this does provide a record of proof that verification was completed. The Report value can be set to show Only differences, or All files.
Log level - Restore jobs will provide a standard level of logging to EVO logs by default. This can be set to No logging or Full logging for the most verbose output.
Restore group - Select the group to be granted restore options in ShareBrowser Desktop
If the local copy has been deleted, restored items will inherit permissions from the parent folder. Items restored to this EVO will also be assigned to the Restore group and Administrators with full access. Cloud-based transfers may incur additional charges by your cloud storage provider.
Note
If files already exist at the restore location, a choice is presented to cancel, skip, or replace
Warning
Depending on the target, a change in storage class (typically as a result of lifecycle management rules) can prevent Slingshot from restoring from archive until content is restored to its original archive location.
Archive jobs
Once Archive is configured, a new section appears for Archive jobs, which is disabled by default.
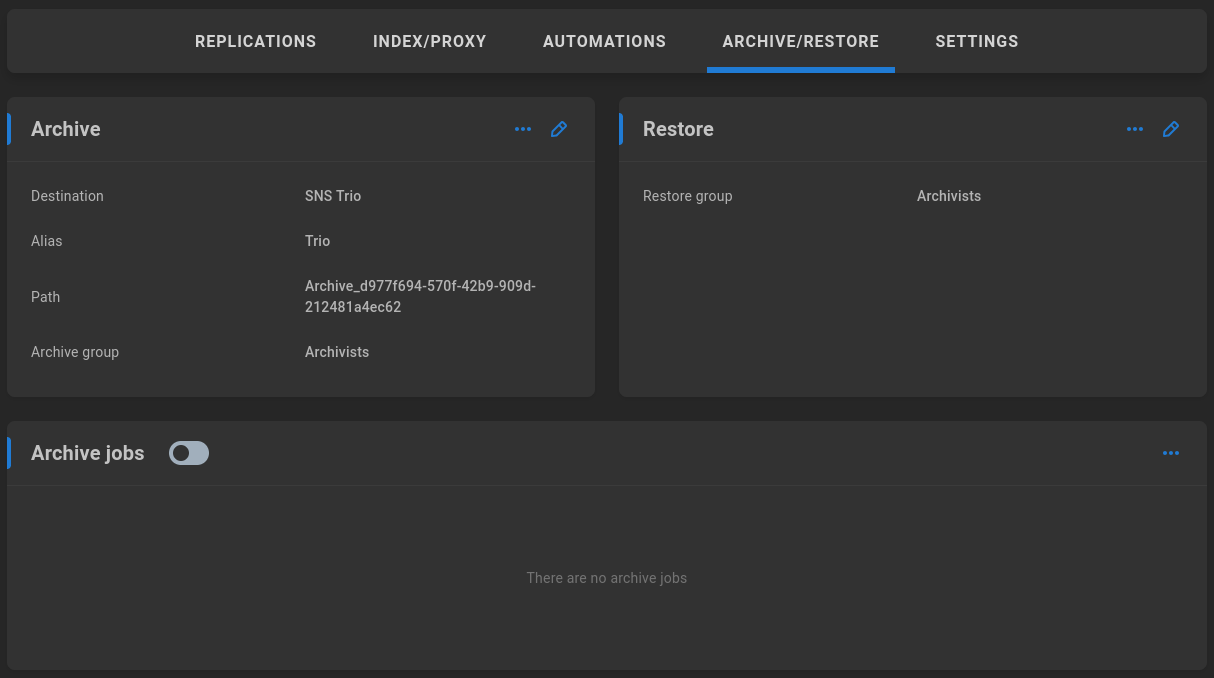
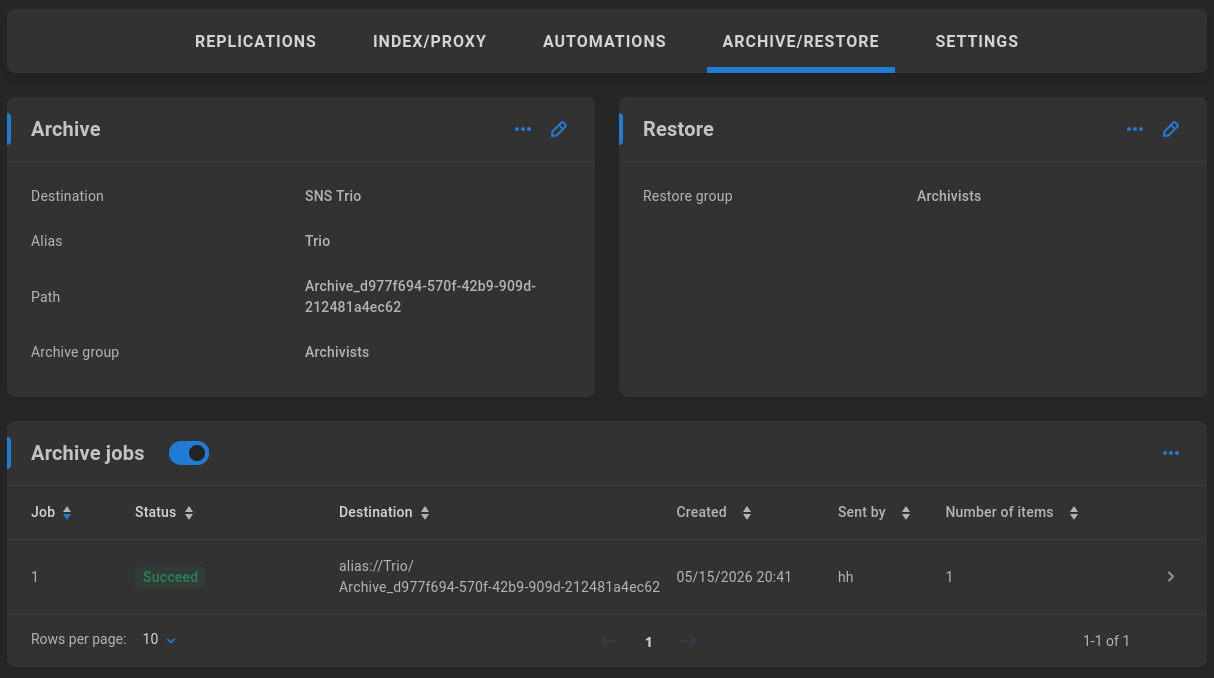
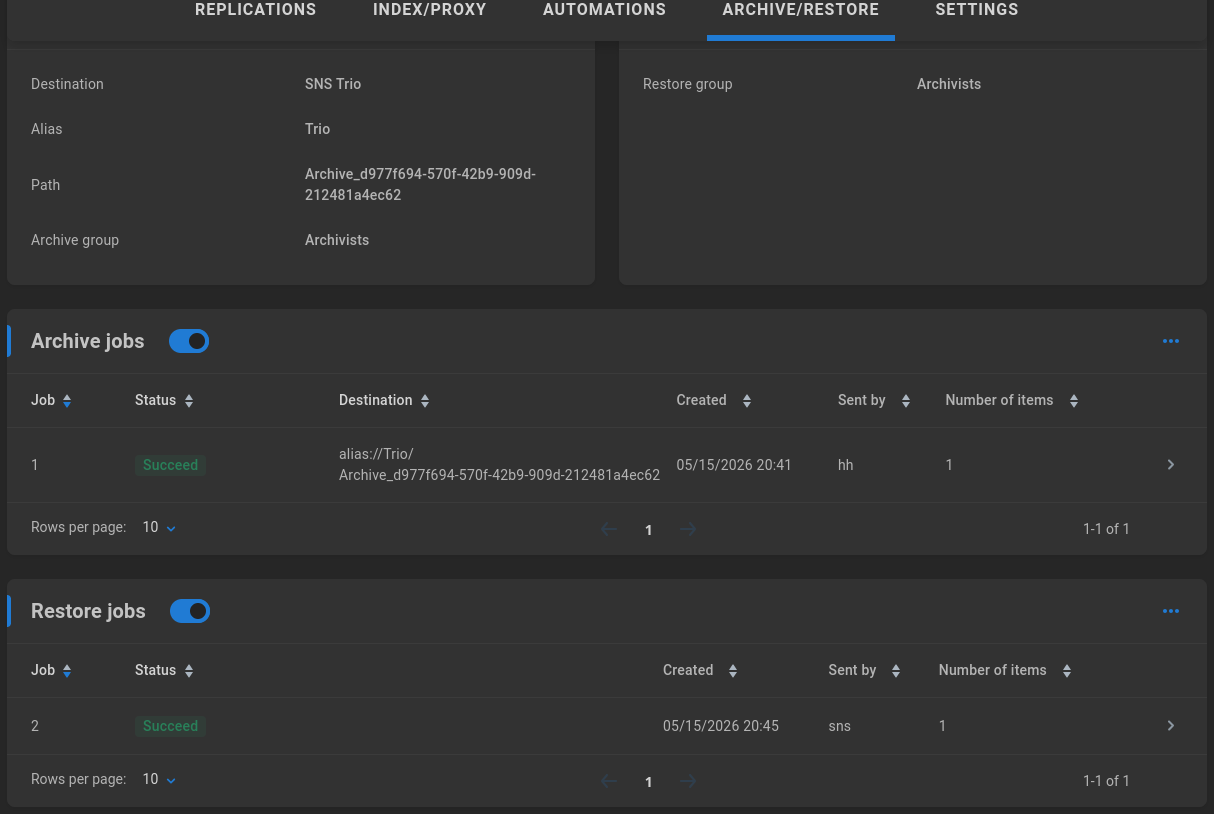
Enable to allow ShareBrowser Desktop users who are members of the selected archive group to perform archive operations. A history of archive jobs is displayed once available, and more details can be gathered by clicking on a job.
Restore jobs
Once Archive is configured, a new section appears for Restore jobs, which is disabled by default.
Enable to allow ShareBrowser Desktop users who are members of the selected restore group to perform restore operations. A history of restore jobs is displayed once available, and more details can be gathered by clicking on a job.
Settings
Aliases
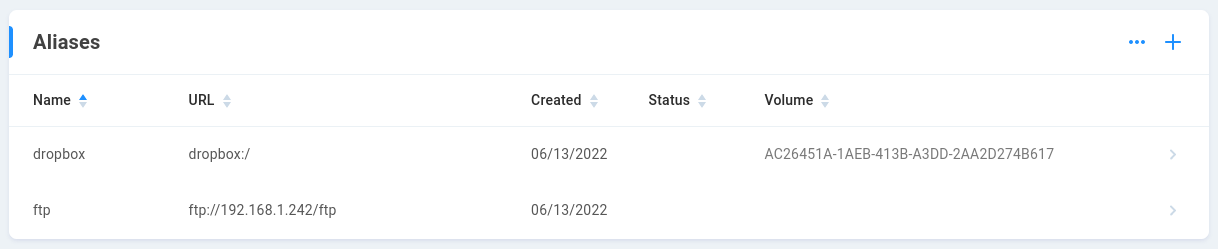
Aliases store credentials used to authenticate Slingshot to various targets. Aliases may be created to authenticate to Azure, Box, Dropbox, FTP, Google Cloud Storage, OneDrive, S3 (AWS or other), SFTP, SMB, and Tricaster. Once an alias is created, it is available for use in replication jobs, automations, and/or by ShareBrowser users. Consider whether the alias should be global or private (per-user). Global aliases are generally created by the EVO admin user. Private aliases are created by and available to the alias creator. Note that write permission is required for ShareBrowser indexing and many automations to work as intended. When using aliases with subdirectories, it’s generally preferred (and sometimes required by the target) to authenticate at the topmost level and then define the relative path for the intended subdirectory, rather than to create an alias directly to a subdirectory.
Click the plus symbol to create a new alias.
Note
The Private toggle is enabled by default. Disable the toggle if a linked automation should be available to multiple users.
Local
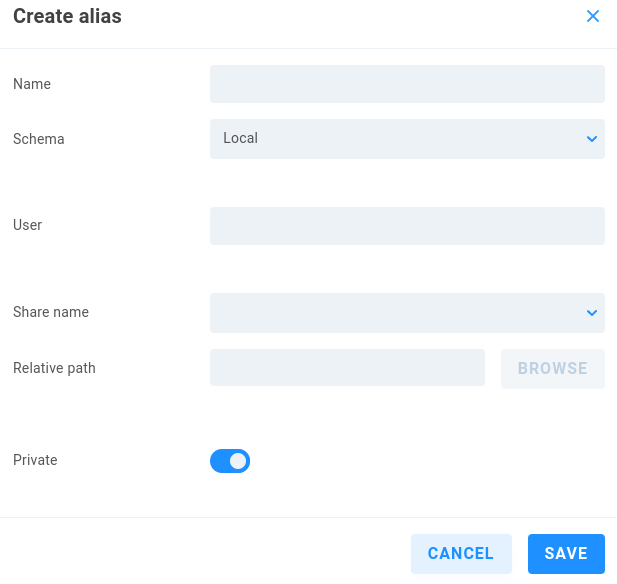
Name - Enter a descriptive name for the alias.
Schema - Select the intended authentication type from the dropdown menu.
User - Define a user that has write access to the share.
Share name - Specify the share requiring authentication.
Relative path - Define or browse to the intended source directory.
Private - Private aliases define transport destinations for a specific ShareBrowser user, and are invoked via API or GUI. If a user owns a Private alias, a context menu is added to their ShareBrowser Client, which appears when right-clicking files in the workstation’s ShareBrowser Client application. Clicking this will copy the selected content to the location defined in the alias. See the ShareBrowser guide for more information: https://studio-network-solutions-sharebrowser-docs.readthedocs-hosted.com/en/latest/
SNS Trio

Name - Enter a descriptive name for the alias.
Schema - Select the intended authentication type from the dropdown menu.
Gateway - Predefined https://gateway.sns3.io/
Bucket - Enter the Trio bucket name.
AccessKey - Enter the AccessKey for the Trio target.
SecretKey - Enter the corresponding SecretKey for the Trio target.
Relative path - Define a relative path if needed.
Private - Private aliases define transport destinations for a specific ShareBrowser user, and are invoked via API or GUI. If a user owns a Private alias, a context menu is added to their ShareBrowser Client, which appears when right-clicking files in the workstation’s ShareBrowser Client application. Clicking this will copy the selected content to the location defined in the alias. See the ShareBrowser guide for more information: https://studio-network-solutions-sharebrowser-docs.readthedocs-hosted.com/en/latest/
SMB
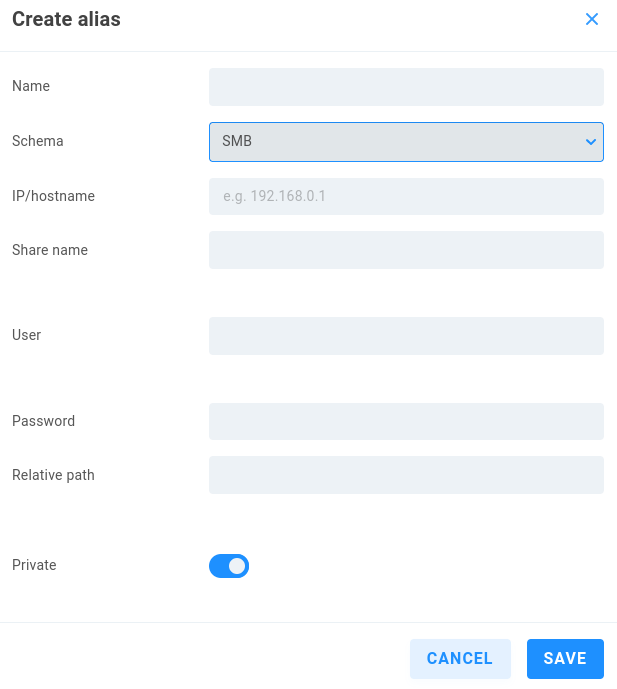
This establishes a connection separate from a mount created at the Shares page. Existing Remote shares may also be used in automations, while there may be scenarios where a discrete SMB connection is preferred for an automation.
Name - Enter a descriptive name for the alias.
Schema - Select the intended authentication type from the dropdown menu.
IP/hostname - Enter the address or name for the remote SMB server.
Share name - Define the path to the share.
User - Enter a valid user name for the remote server.
Password - Enter the user password.
Relative path - Define the path to the destination on the share if needed.
Private - Private aliases define transport destinations for a specific ShareBrowser user, and are invoked via API or GUI. If a user owns a Private alias, a context menu is added to their ShareBrowser Client, which appears when right-clicking files in the workstation’s ShareBrowser Client application. Clicking this will copy the selected content to the location defined in the alias. See the ShareBrowser guide for more information: https://studio-network-solutions-sharebrowser-docs.readthedocs-hosted.com/en/latest/
FTP
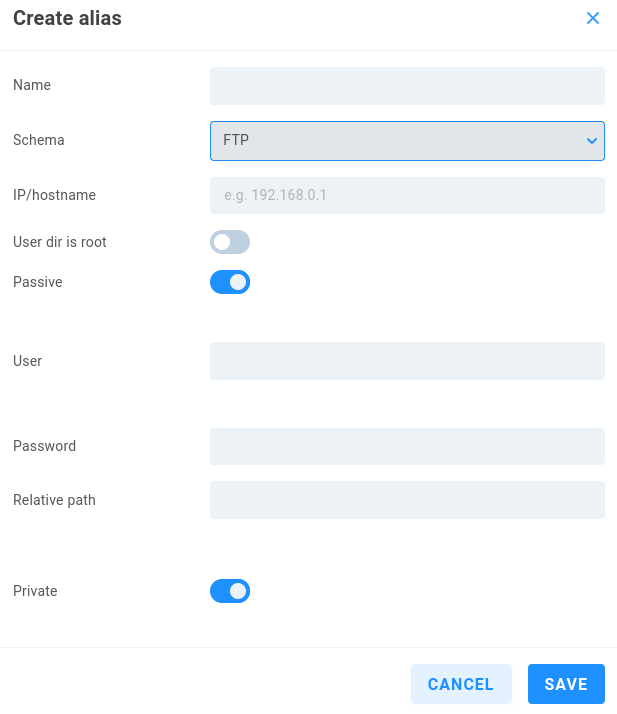
Name - Enter a descriptive name for the alias.
Schema - Select the intended authentication type from the dropdown menu.
IP/hostname - Enter the address or name for the remote SMB server.
User dir is root - Disabled by default. Enable if needed (if user directory is root).
Passive - Enabled by default, which can help prevent firewall interference. Disable if the FTP server denies PASV.
User - Enter a valid user name for the remote server.
Password - Enter the user password.
Relative path - Define the path to the destination on the share if needed.
Private - Private aliases define transport destinations for a specific ShareBrowser user, and are invoked via API or GUI. If a user owns a Private alias, a context menu is added to their ShareBrowser Client, which appears when right-clicking files in the workstation’s ShareBrowser Client application. Clicking this will copy the selected content to the location defined in the alias. See the ShareBrowser guide for more information: https://studio-network-solutions-sharebrowser-docs.readthedocs-hosted.com/en/latest/
SFTP
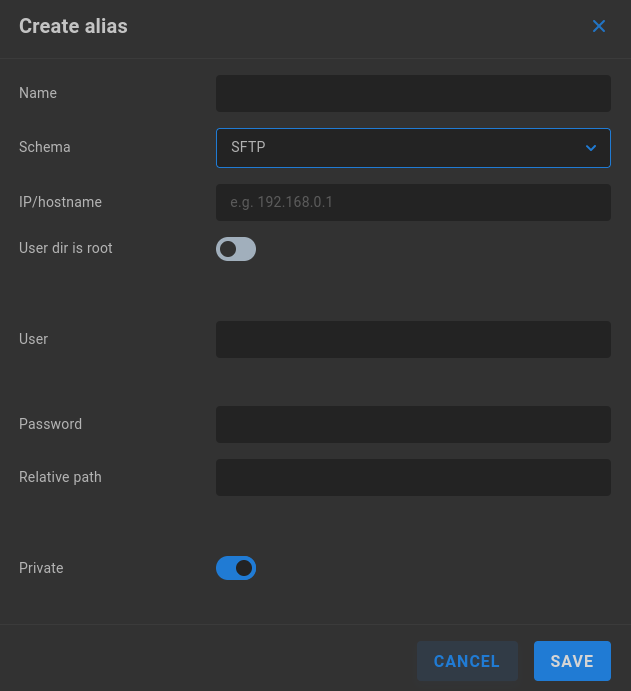
Name - Enter a descriptive name for the alias.
Schema - Select the intended authentication type from the dropdown menu.
IP/hostname - Enter the address or name for the remote SMB server.
User dir is root - Disabled by default. Enable if needed (if user directory is root).
User - Enter a valid user name for the remote server.
Password - Enter the user password.
Relative path - Define the path to the destination on the share if needed.
Private - Private aliases define transport destinations for a specific ShareBrowser user, and are invoked via API or GUI. If a user owns a Private alias, a context menu is added to their ShareBrowser Client, which appears when right-clicking files in the workstation’s ShareBrowser Client application. Clicking this will copy the selected content to the location defined in the alias. See the ShareBrowser guide for more information: https://studio-network-solutions-sharebrowser-docs.readthedocs-hosted.com/en/latest/
S3
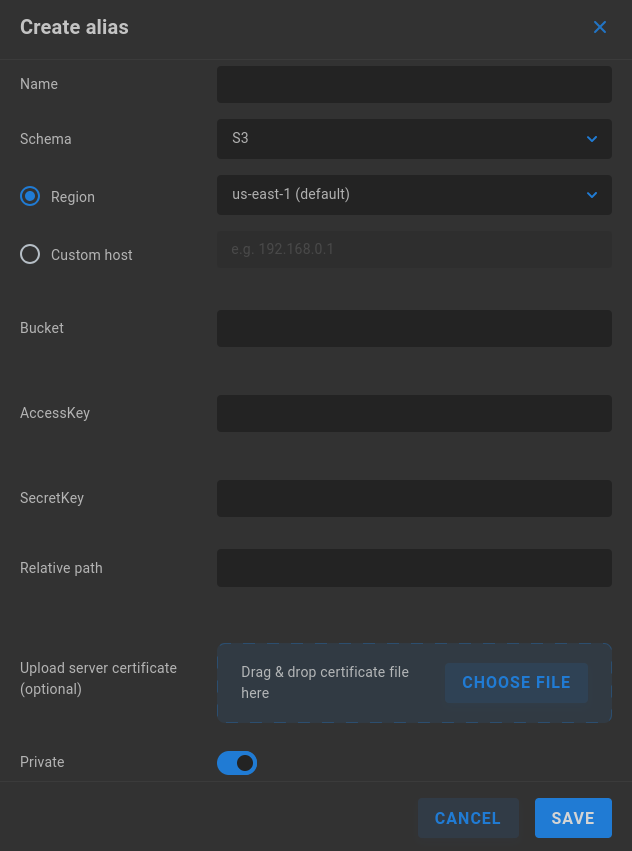
Name - Enter a descriptive name for the alias.
Schema - Select the intended authentication type from the dropdown menu.
Region - Select if using AWS S3. The us-east-1 region is selected by default.
Custom Host - Enter the IP address or host name of an alternative S3 target.
Bucket - Enter the S3 bucket name.
AccessKey - Enter the AccessKey for the S3 target.
SecretKey - Enter the corresponding SecretKey for the S3 target.
Relative path - Define a relative path if needed.
Upload server certificate (optional) - Add a server certificate (PEM format) if required by the target (self-signed is supported).
Private - Private aliases define transport destinations for a specific ShareBrowser user, and are invoked via API or GUI. If a user owns a Private alias, a context menu is added to their ShareBrowser Client, which appears when right-clicking files in the workstation’s ShareBrowser Client application. Clicking this will copy the selected content to the location defined in the alias. See the ShareBrowser guide for more information: https://studio-network-solutions-sharebrowser-docs.readthedocs-hosted.com/en/latest/
Azure
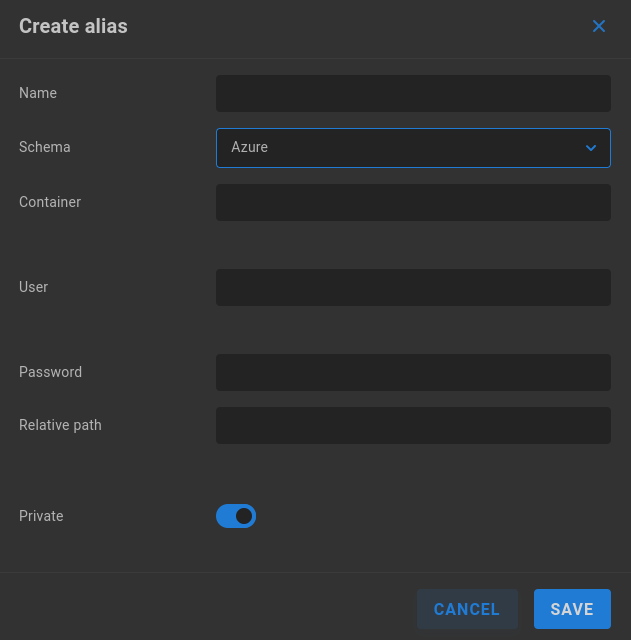
Name - Enter a descriptive name for the alias.
Schema - Select the intended authentication type from the dropdown menu.
Container - Enter the Subscription ID.
User - Enter the authenticating user name.
Password - Enter the password for the authenticating user.
Relative path - Define a relative path if needed.
Private - Private aliases define transport destinations for a specific ShareBrowser user, and are invoked via API or GUI. If a user owns a Private alias, a context menu is added to their ShareBrowser Client, which appears when right-clicking files in the workstation’s ShareBrowser Client application. Clicking this will copy the selected content to the location defined in the alias. See the ShareBrowser guide for more information: https://studio-network-solutions-sharebrowser-docs.readthedocs-hosted.com/en/latest/
Dropbox
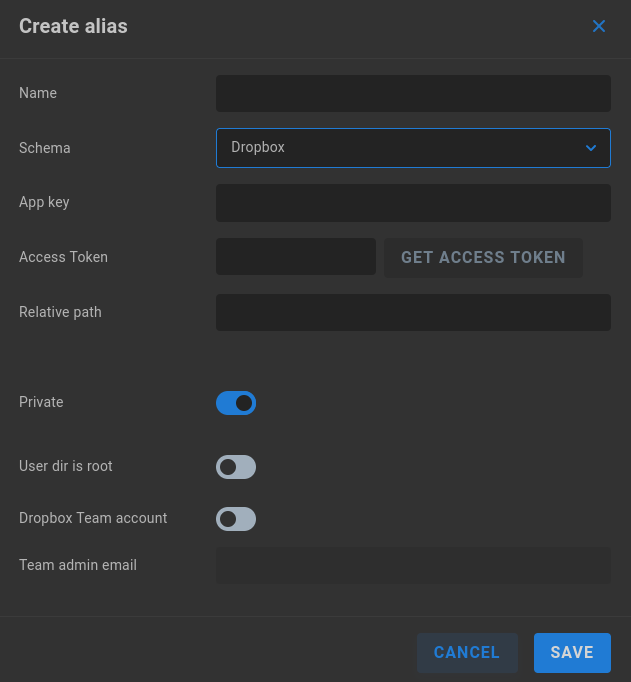
Name - Enter a descriptive name for the alias.
Schema - Select the intended authentication type from the dropdown menu.
App key - Enter the App key listed at the Dropbox App console.
Access Token - Click “GET ACCESS TOKEN” to retrieve and enter the required code.
Relative path - Define a relative path if needed.
Private - Private aliases define transport destinations for a specific ShareBrowser user, and are invoked via API or GUI. If a user owns a Private alias, a context menu is added to their ShareBrowser Client, which appears when right-clicking files in the workstation’s ShareBrowser Client application. Clicking this will copy the selected content to the location defined in the alias. See the ShareBrowser guide for more information: https://studio-network-solutions-sharebrowser-docs.readthedocs-hosted.com/en/latest/
User dir is root - Disabled by default. Toggle on if the alias connects to a user directory.
Dropbox Team account - Disabled by default. Enable if the Dropbox for Teams plan is used.
Team admin email - Enter the relevant email address if Dropbox Team account is enabled.
OneDrive
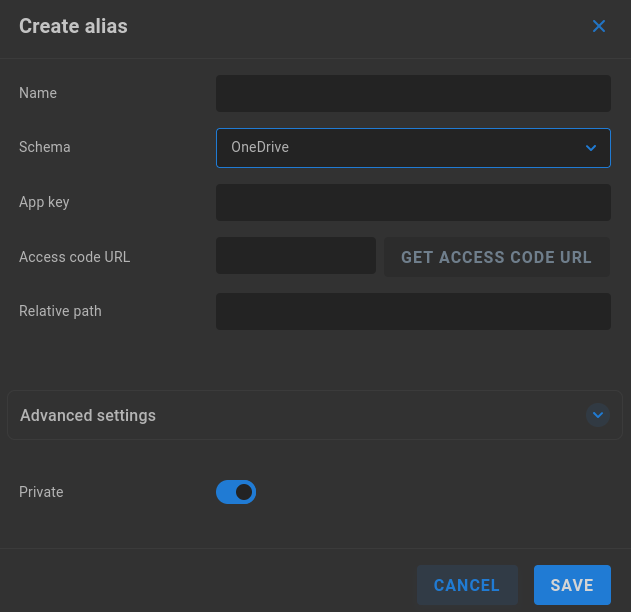
Name - Enter a descriptive name for the alias.
Schema - Select the intended authentication type from the dropdown menu.
App key - Enter the Application (Client) ID.
Access code URL - Click “GET ACCESS CODE URL” to retrieve and enter the required code.
Relative path - Define a relative path if needed.
Advanced settings
DriveID (optional) - Enter the DriveID if available.
Drive type (optional) - Select Personal, Business, or Document library if DriveID is enabled.
Private - Private aliases define transport destinations for a specific ShareBrowser user, and are invoked via API or GUI. If a user owns a Private alias, a context menu is added to their ShareBrowser Client, which appears when right-clicking files in the workstation’s ShareBrowser Client application. Clicking this will copy the selected content to the location defined in the alias. See the ShareBrowser guide for more information: https://studio-network-solutions-sharebrowser-docs.readthedocs-hosted.com/en/latest/
Google Cloud Storage
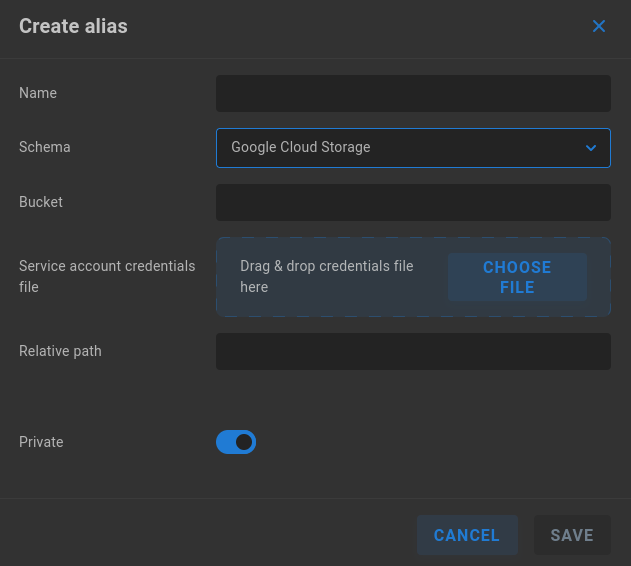
Name - Enter a descriptive name for the alias.
Schema - Select the intended authentication type from the dropdown menu.
Bucket - Enter the bucket name as it appears in the Google Cloud Bucket details.
Service account credentials file - Upload the JSON provided by the Google Cloud IAM console.
Relative path - Define a relative path if needed.
Private - Private aliases define transport destinations for a specific ShareBrowser user, and are invoked via API or GUI. If a user owns a Private alias, a context menu is added to their ShareBrowser Client, which appears when right-clicking files in the workstation’s ShareBrowser Client application. Clicking this will copy the selected content to the location defined in the alias. See the ShareBrowser guide for more information: https://studio-network-solutions-sharebrowser-docs.readthedocs-hosted.com/en/latest/
Tricaster
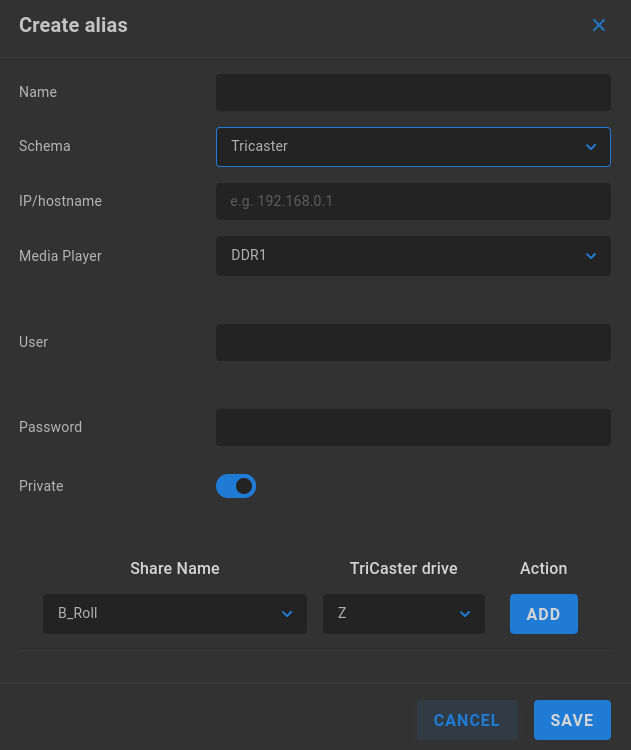
Name - Enter a descriptive name for the alias.
Schema - Select the intended authentication type from the dropdown menu.
IP/hostname - Enter the IP address or hostname for the Tricaster device.
Media Player - Select the media bin (DDR1, DDR2, DDR3, DDR4, GFX1, GFX2).
User - Enter the user name/
Password - Enter the corresponding password for the above user.
Private - Private aliases define transport destinations for a specific ShareBrowser user, and are invoked via API or GUI. If a user owns a Private alias, a context menu is added to their ShareBrowser Client, which appears when right-clicking files in the workstation’s ShareBrowser Client application. Clicking this will copy the selected content to the location defined in the alias. See the ShareBrowser guide for more information: https://studio-network-solutions-sharebrowser-docs.readthedocs-hosted.com/en/latest/
From the dropdown menus, choose the Share Name, associated TriCaster drive mount, and then click ADD before saving the location.
Box
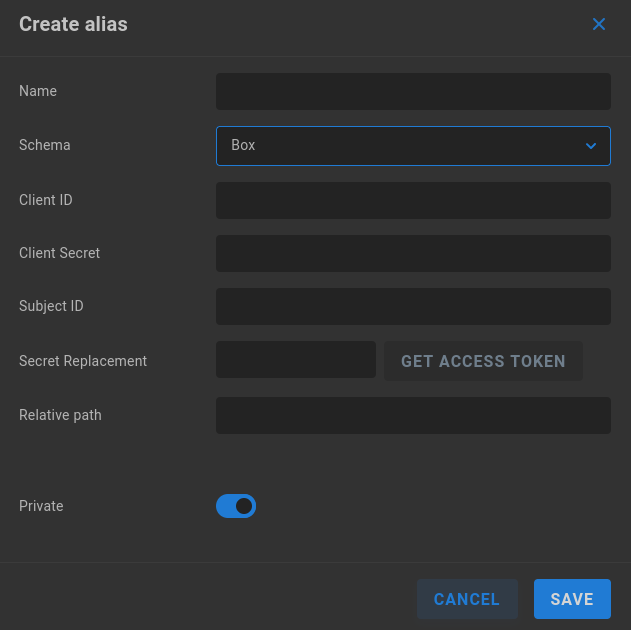
Name - Enter a descriptive name for the alias.
Schema - Select the intended authentication type from the dropdown menu.
Client ID - Enter the Client ID as it appears in the Azure portal.
Client Secret - Enter the Client Secret as it appears in the Azure portal.
Subject ID - Enter the Subject ID if required.
Secret Replacement - Click “GET ACCESS TOKEN” to request authorization from Azure.
Relative path - Define a relative path if needed.
Private - Private aliases define transport destinations for a specific ShareBrowser user, and are invoked via API or GUI. If a user owns a Private alias, a context menu is added to their ShareBrowser Client, which appears when right-clicking files in the workstation’s ShareBrowser Client application. Clicking this will copy the selected content to the location defined in the alias. See the ShareBrowser guide for more information: https://studio-network-solutions-sharebrowser-docs.readthedocs-hosted.com/en/latest/
Watermarks
It’s possible to add watermarks to ShareBrowser Preview files and/or edit-ready proxies generated by Slingshot. Click the plus symbol to add a new watermark.
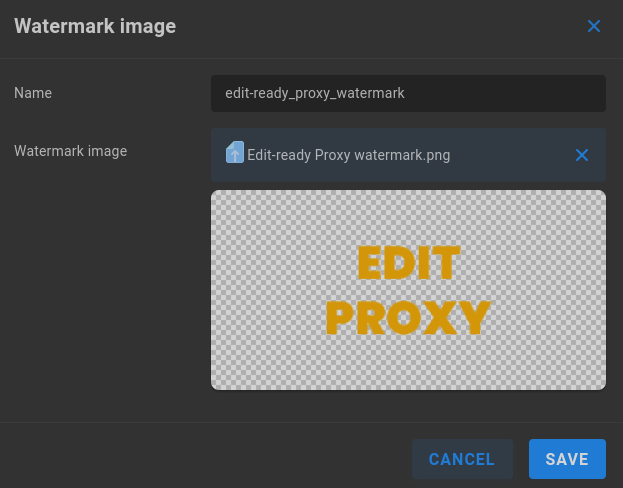
Name - Give the watermark a descriptive name
Watermark image - Drag and drop or click “CHOOSE FILE” to upload a PNG
Note
Adding or modifying a watermark may result in a new transcode operation for existing content. If a preview or edit proxy already exists, it will be updated with a new version according to the watermark setting.
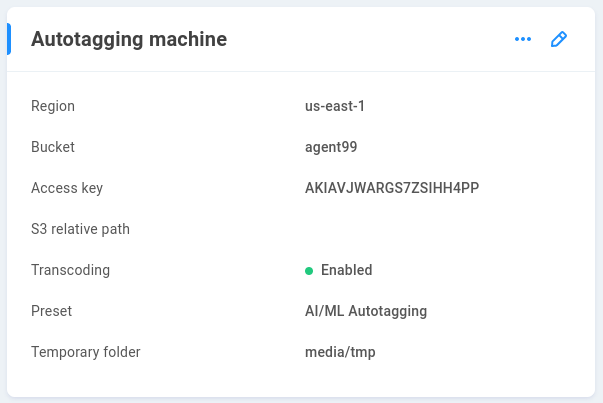
Autotagging machine
When artificial intelligence/machine learning services are configured, ShareBrowser users can upload media for machine analysis and automatic content tagging.
Prior to configuration on EVO, some other steps need to be taken to add automatic tagging using AI/ML services:
Create an AWS account with Amazon. Take a look at their billing costs for the features you intend to use.
Enable S3 and Rekognition services.
Create an IAM user with permissions for AmazonRekognitionFullAccess and AmazonS3FullAccess.
Create an S3 bucket and make sure that the created user has permissions to access this bucket.
Generate the access key (Access key ID and Secret Access Key) on the user’s page of Amazon Services.
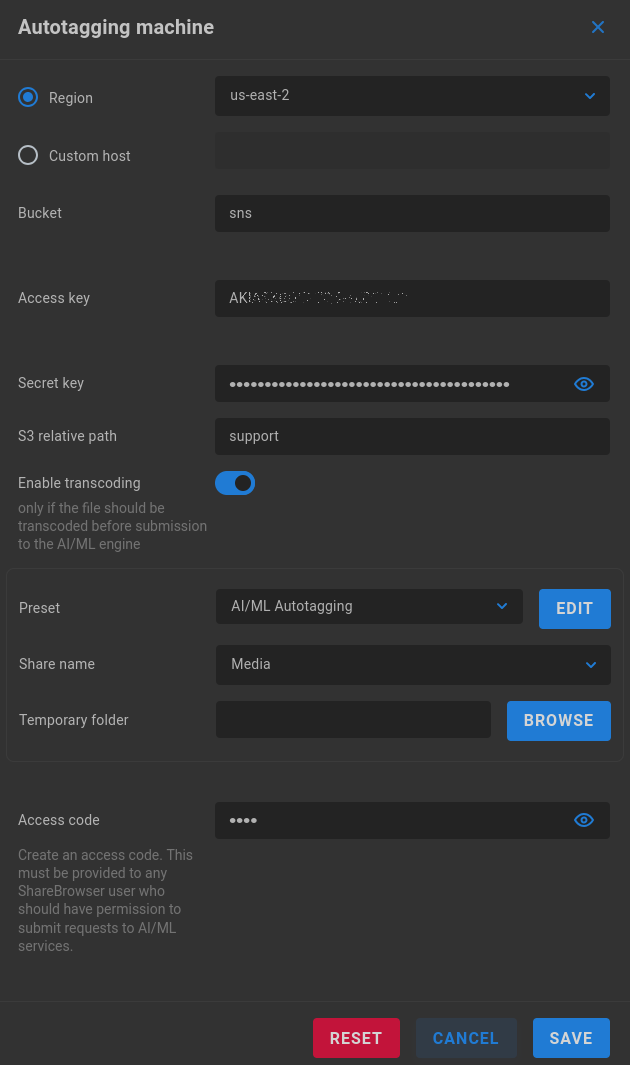
Region/Custom host - Select the AWS region for your bucket or enter the custom host information.
Bucket - Enter the S3 bucket name.
Access key - Enter the access key provided by AWS.
Secret key - Enter the secret key provided by AWS.
S3 relative path - Define a path if needed
Enable transcoding - By default, a temporary proxy of the original file is created for upload to Rekognition when a ShareBrowser user clicks Analyze. Sending a smaller version of the original file can substantially reduce bandwidth usage for the cloud service. The Preset determines the quality (and therefore, size) of the proxy that’s generated. Higher-resolution proxies may yield more accurate tagging results at the cost of increased bandwidth. A temporary folder needs to be designated for proxy staging during the operation when this setting is enabled.
Preset - The AI/ML Autotagging preset is used by default, which is designed to be as lightweight as possible for metered connections, though it’s possible to select from any available preset or click EDIT to change specific values for the selected preset.
Share name - If transcoding is enabled, select a share to use for temporary transcode storage.
Temporary folder - Specify or browse to a directory on the share to house the temporary proxy for upload.
Access code - Optionally create a custom access code to protect against unwanted bandwidth consumption. This will require users to enter the access code in order to submit media from the ShareBrowser web app for autotagging.
Presets
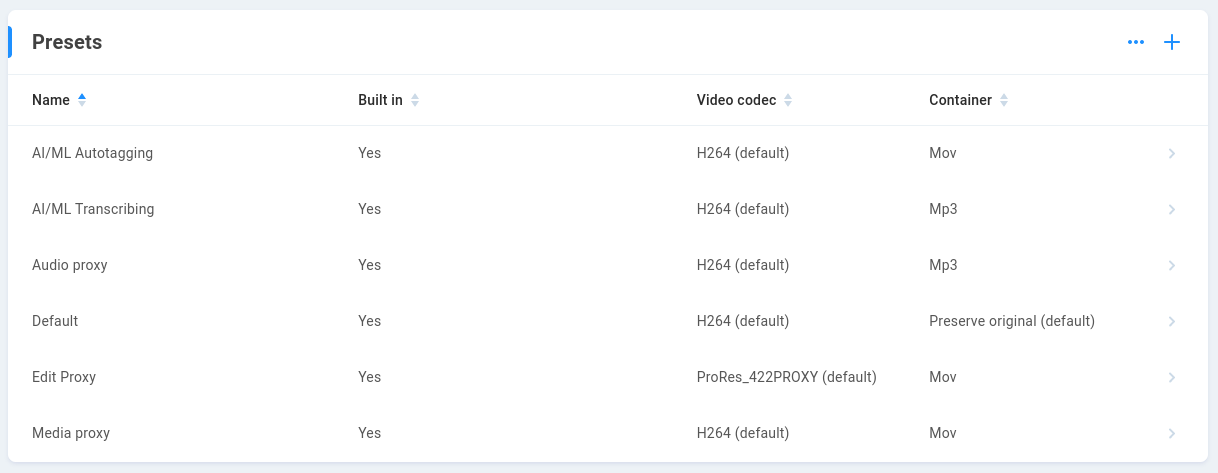
Current transcoding presets are displayed, with the option to create new custom presets or to edit an existing global preset value. Take care to note the original settings if experimenting with adjustment of a global default preset. Custom preset construction is outside the scope of this document.
Completed job history

A history of Slingshot automation records will persist in the interface for two weeks by default.
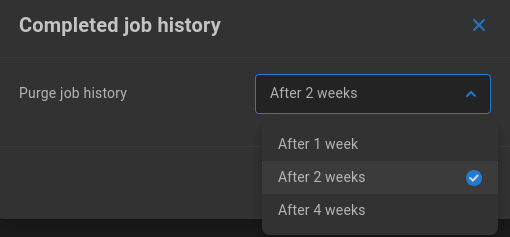
Click the pencil to select the retention time for reports of completed jobs (After 1 week, After 2 weeks, After 4 weeks).
Replication logs
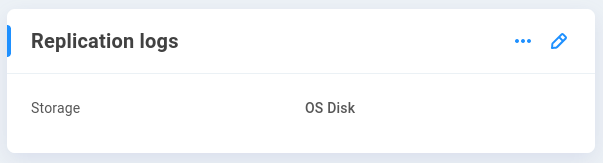
A transfer summary report is created for each replication job, while more details about the replication are logged in a separate log file, which is sent to the selected destination.
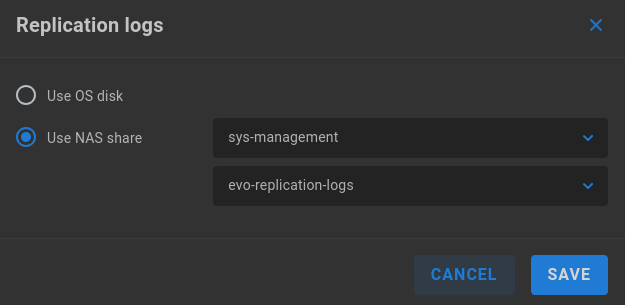
The “sys-management” share is automatically selected if it exists, or another network share location may be specified. Alternatively, the OS disk may be selected, in which case the detailed logs will only be available in System logs downloaded from the Support page.
Use OS disk - Logs will rotate automatically, with recent replication logs included in EVO logs.
Use NAS share - Logs will not rotate automatically. Select a share and folder location; the “evo-replication-logs” folder is suggested, with the option to use the root of the share or create a new destination directory.
Note
Detailed replication logs will not rotate automatically when the storage location is set to “Use NAS share”.